
January 6, 2026
Ship It Right: A Swift Package Quality Checklist. Part 3 of 3.
Oleksii Kolomiiets

Parts 1 and 2 established everything you need for a solid, maintainable Swift package: documentation, automated quality checks, contributor-friendly processes, and professional releases. Your package is technically excellent and easy to contribute to.
But here’s the problem: good code doesn’t promote itself.
I’ve experienced this with every project. I spent weeks building SwiftFormatLintPlugin, writing documentation, setting up CI, creating examples. Then I pushed it to GitHub and… waited. Nothing happened. No stars, no issues, no discussions.
This series is for Swift developers turning internal packages into polished public repositories. Parts 1–2 covered documentation, quality, and community. This final part focuses on growth and visibility.
The same code, after I actually shared it on social media, started getting traction. Developers discovered it. The difference wasn’t the code — it was visibility.
You can build the best Swift framework in the world, but if developers don’t know about it, the impact is zero.
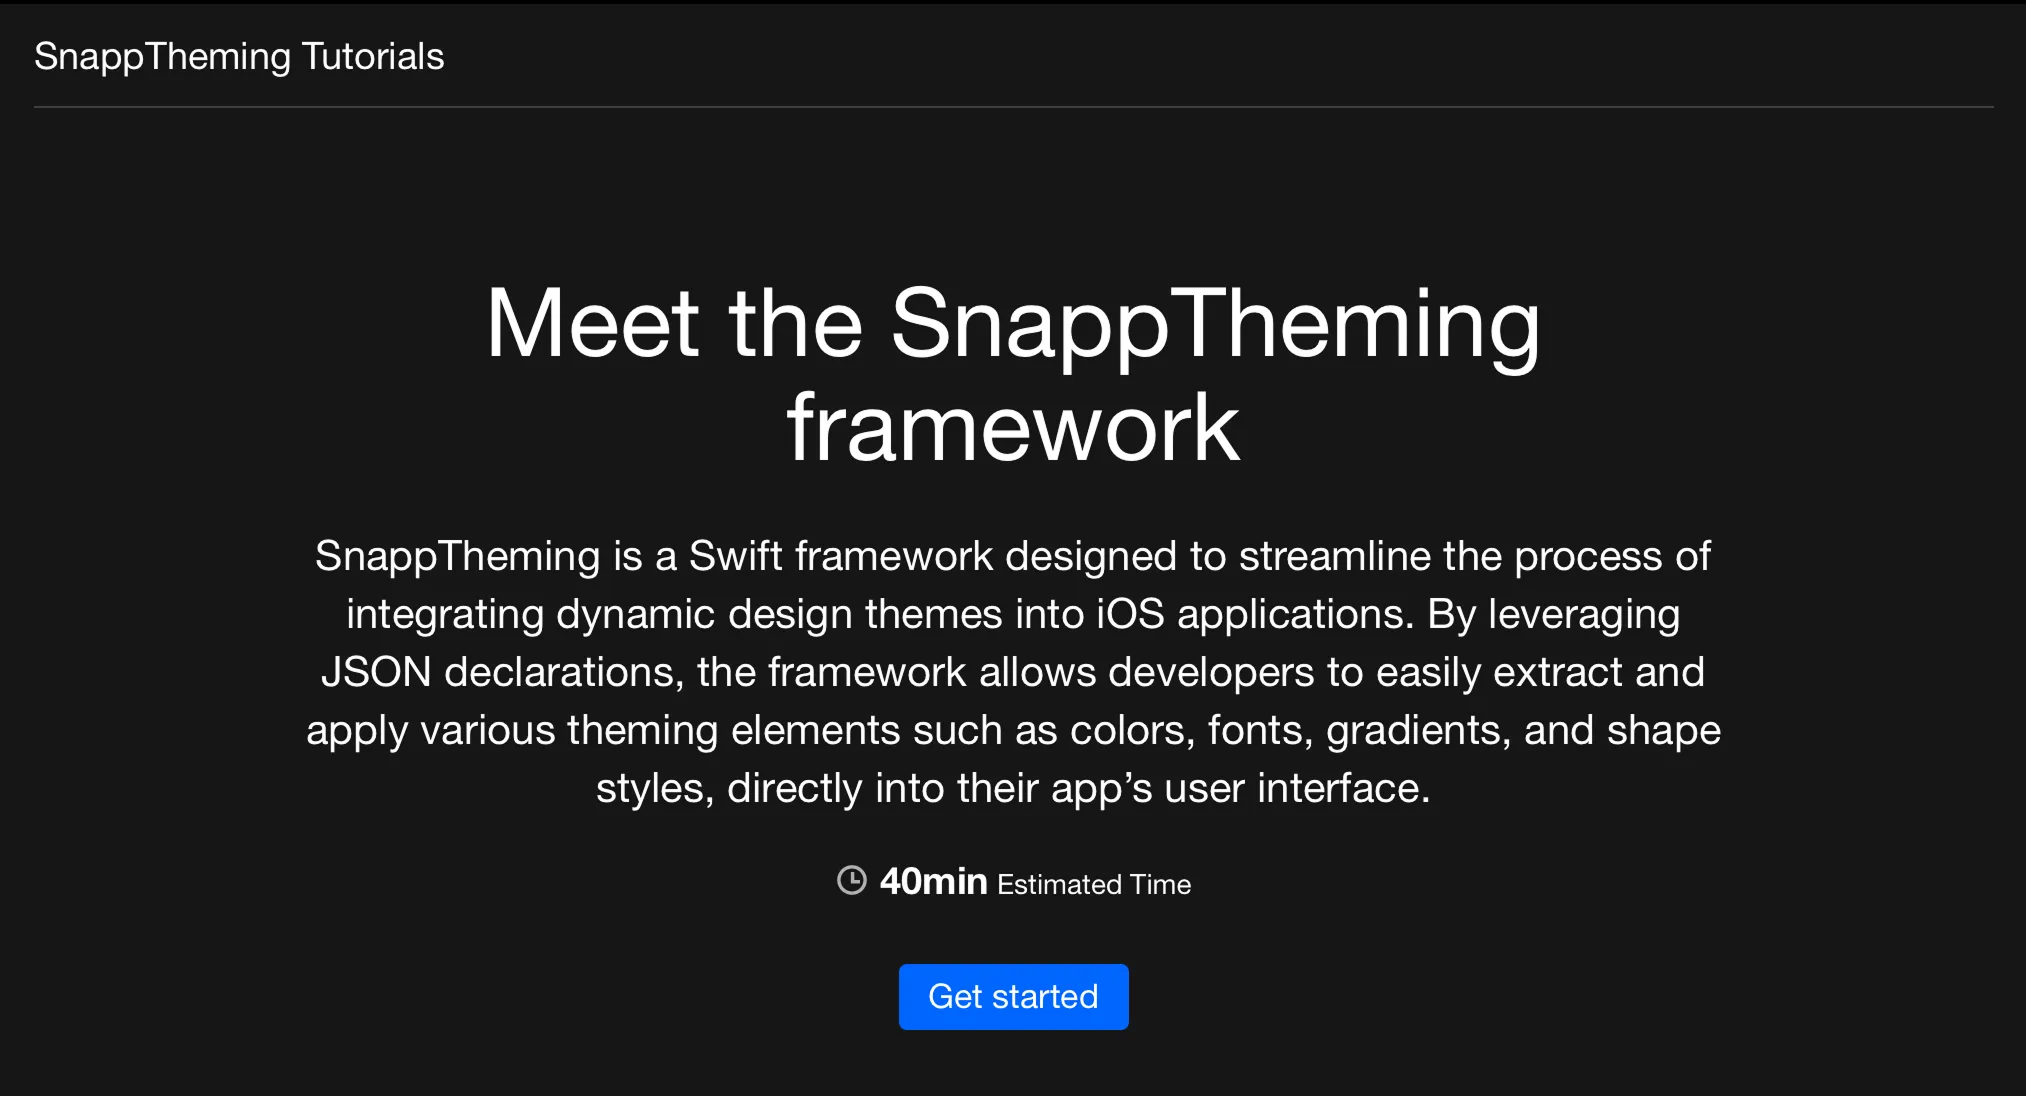
Tutorials: Interactive Learning with DocC
We have DocC to create tutorials — quick-starts or how-tos with code and screenshots in a playful way. Tutorials are interactive, step-by-step guides that walk users through actual implementation. They’re more engaging than articles and more structured than example code.
I saw the impact tutorials can have when we added them to SnappTheming. Instead of users asking “how do I get started?” in issues, they will work through the tutorial and show up with specific, advanced questions. The tutorial does the heavy lifting of onboarding.
Tutorials vs Articles
Both are valuable, but they serve different purposes:
Tutorials — “Let’s build something together.” Interactive, step-by-step, with specific outcomes. Best for getting started or learning a workflow.
Articles — “Here’s how this works.” Explanatory, reference-oriented. Best for understanding concepts or exploring features.
Use tutorials for getting started guides, common integration patterns, and building complete examples. Use articles for API reference, architecture explanations, and configuration guides.
When to Create Tutorials
Create tutorials for getting started (every framework should have one), common patterns (frequent integration scenarios), and complex features (anything taking more than a few lines to set up).
Don’t create tutorials for every single API method (that’s what articles are for), edge cases, or internal implementation details.
The Playful Advantage
Tutorials are playful in a way that API documentation isn’t. Users actively build something, see results at each step, and feel progress. This builds confidence and engagement.
I’ve seen users work through tutorials and then immediately integrate the framework into their projects. The tutorial gave them enough confidence to commit. That’s the power of interactive learning.
If you want users to quickly grasp your framework and start using it confidently, tutorials are one of the highest-value investments you can make.
Promotion: Good Code Doesn’t Promote Itself
You built something valuable. Now make sure the people who need it can find it. This isn’t about being pushy or spammy. It’s about respectfully connecting your work with developers who have the problems your tool solves.
The Problem: The Silent Launch
I made this mistake with my first few open-source tools. I’d build something useful, write great documentation, push to GitHub, and wait for people to discover it. They didn’t.

GitHub has millions of repositories. Nobody randomly discovers your package through divine intervention. You have to tell people it exists.
The tools that succeeded were the ones I actually promoted: posting to Swift forums, sharing on social media, submitting to newsletters. Same code quality, different outcomes — all because of visibility.
Where to Share
Social media works best when you meet developers where they already hang out. The Swift community is active and engaged on Bluesky and Mastodon, making both great places to share updates and start conversations. LinkedIn has also become surprisingly effective lately, especially for reaching professionals who care about real-world usage and product decisions.
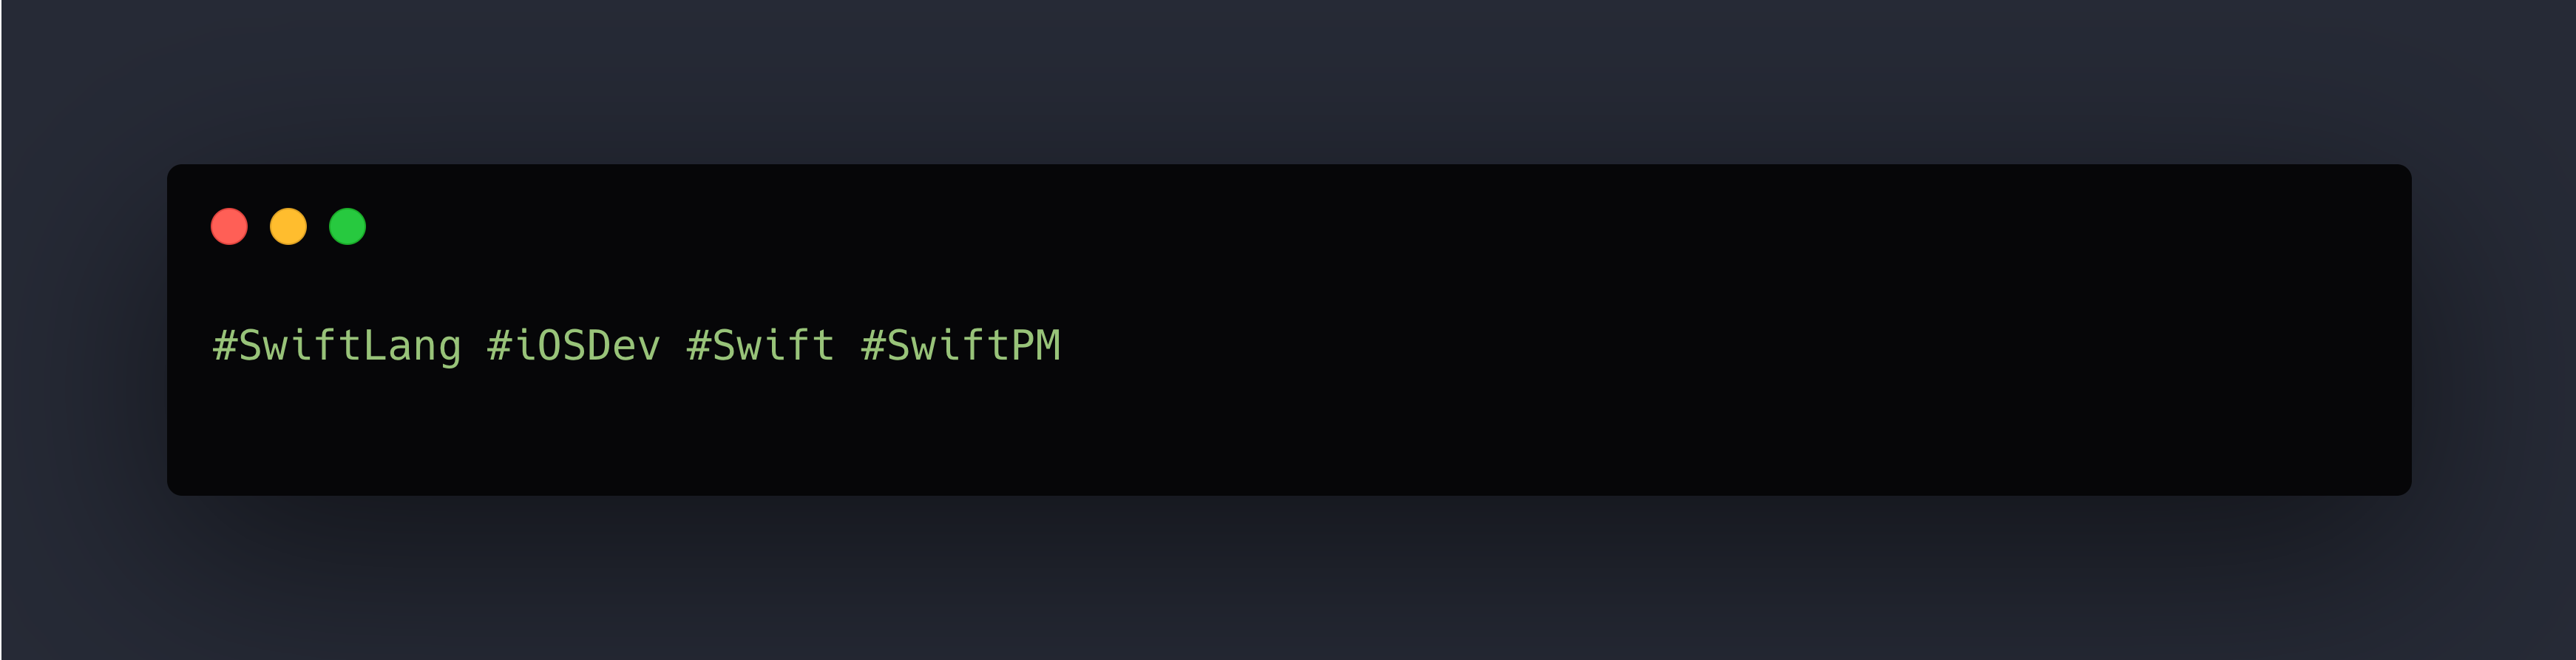
Share launch announcements with clear screenshots or short demo GIFs. Post about major releases, highlight interesting features, and show practical usage examples. Focus on being informative rather than promotional — developers value clarity and substance. Use relevant hashtags to help the right people find your posts:
Newsletters
There are a bunch of good newsletters. Submit your project through their submission form. Getting featured exposes your tool to thousands of iOS developers. If there is no form, do some research and find the newsletter’s social accounts to send a direct message.
Submit when you launch version 1.0, add significant new features, or have an interesting technical write-up about building it.
Relevant subreddits: r/swift and r/iOSProgramming. Reddit appreciates substance. Don’t just drop a link — explain what problem you’re solving and why you built it. Engage with comments.
Technical Blogs
Write about building your tool: technical challenges you solved, design decisions you made, lessons learned. Post on Dev.to, Medium, your personal blog, or company engineering blog. These articles serve dual purposes: they promote your tool and provide valuable content to the community.
How to Announce: Simple, Clear, Honest
When announcing:
- Lead with the problem — What does this solve?
- Show, don’t just tell — Include a code example, screenshot, or demo
- Link to documentation — Make it trivial to learn more
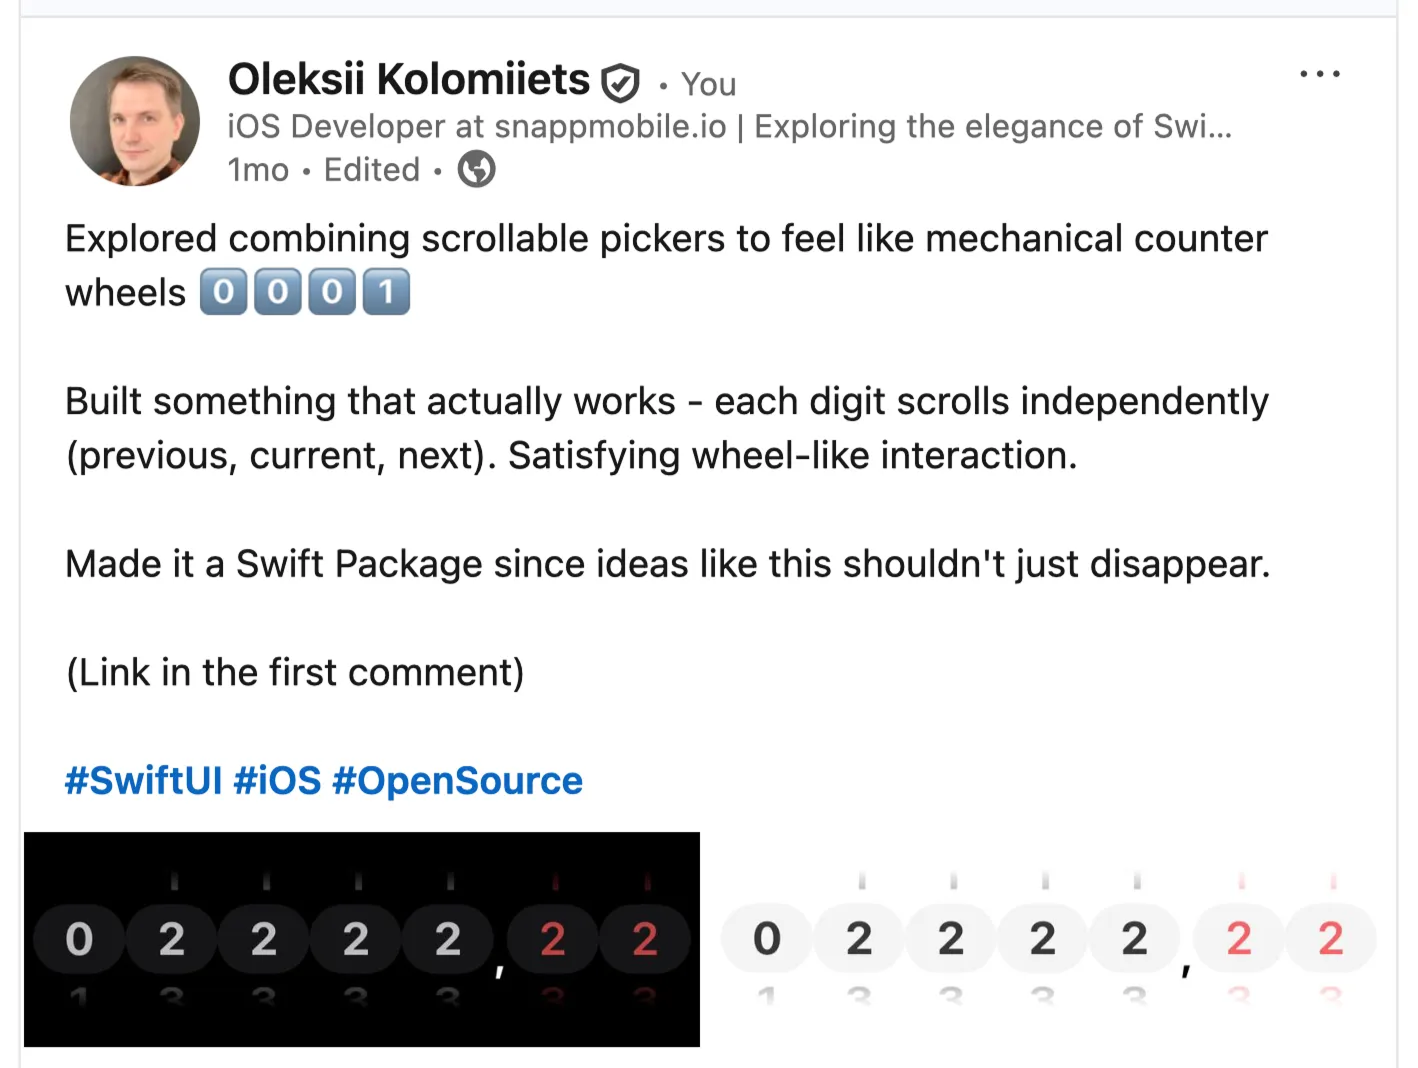
Example announcement of CounterPicker:
Ongoing Engagement
Promotion isn’t just the launch. Stay engaged: answer questions promptly, share updates when you ship significant releases, highlight community contributions publicly, and write follow-up content.
What Not to Do
Don’t spam (posting to 10 subreddits is spam), don’t beg for stars, don’t over-promote every minor commit, don’t be defensive about critical feedback, and don’t make promises you can’t keep.
You Built Something Valuable — Share It
You invested time building a tool that solves a real problem. The final step is making sure the developers who need it know it exists.
Promotion isn’t self-aggrandizement. It’s connecting your solution with people who have the problem it solves. Share your work. The community wants to know about it.
Swift Package Index: Free Documentation Hosting
There’s a free way to have documentation hosted at Swift Package Index. You need to register your framework at their GitHub and meet their expectations with an spi.yml file. This gets you professional documentation hosting without paying for servers.
I host documentation for my packages on Swift Package Index. It’s free, reliable, and integrates perfectly with the Swift ecosystem.
The Swift Package Index team reviews submissions (usually within a day) and merges if your package meets basic requirements: valid Swift package with Package.swift, public repository, and semantic versioning tags.
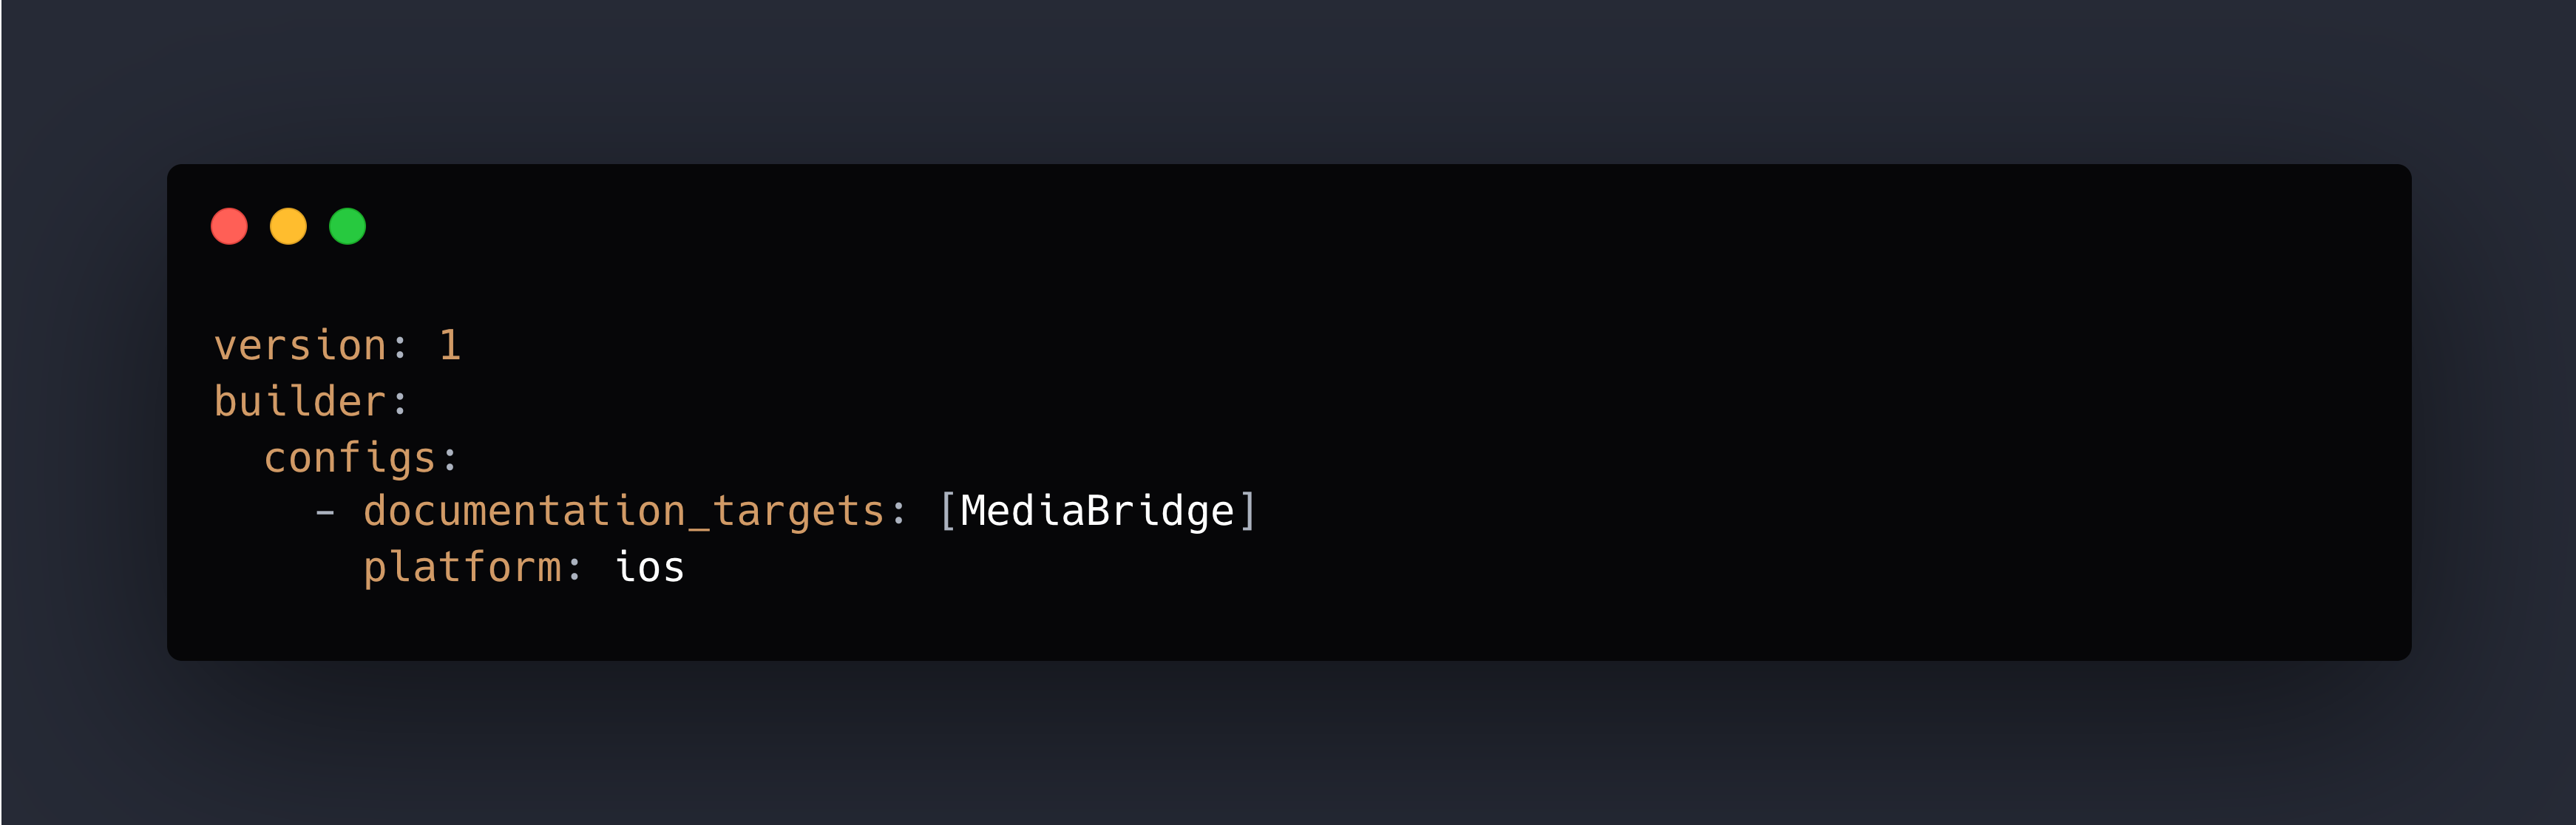
This tells Swift Package Index which targets to build documentation for, what platform to build on, and what Swift version to use.
Documentation updates automatically when you push new release tags.
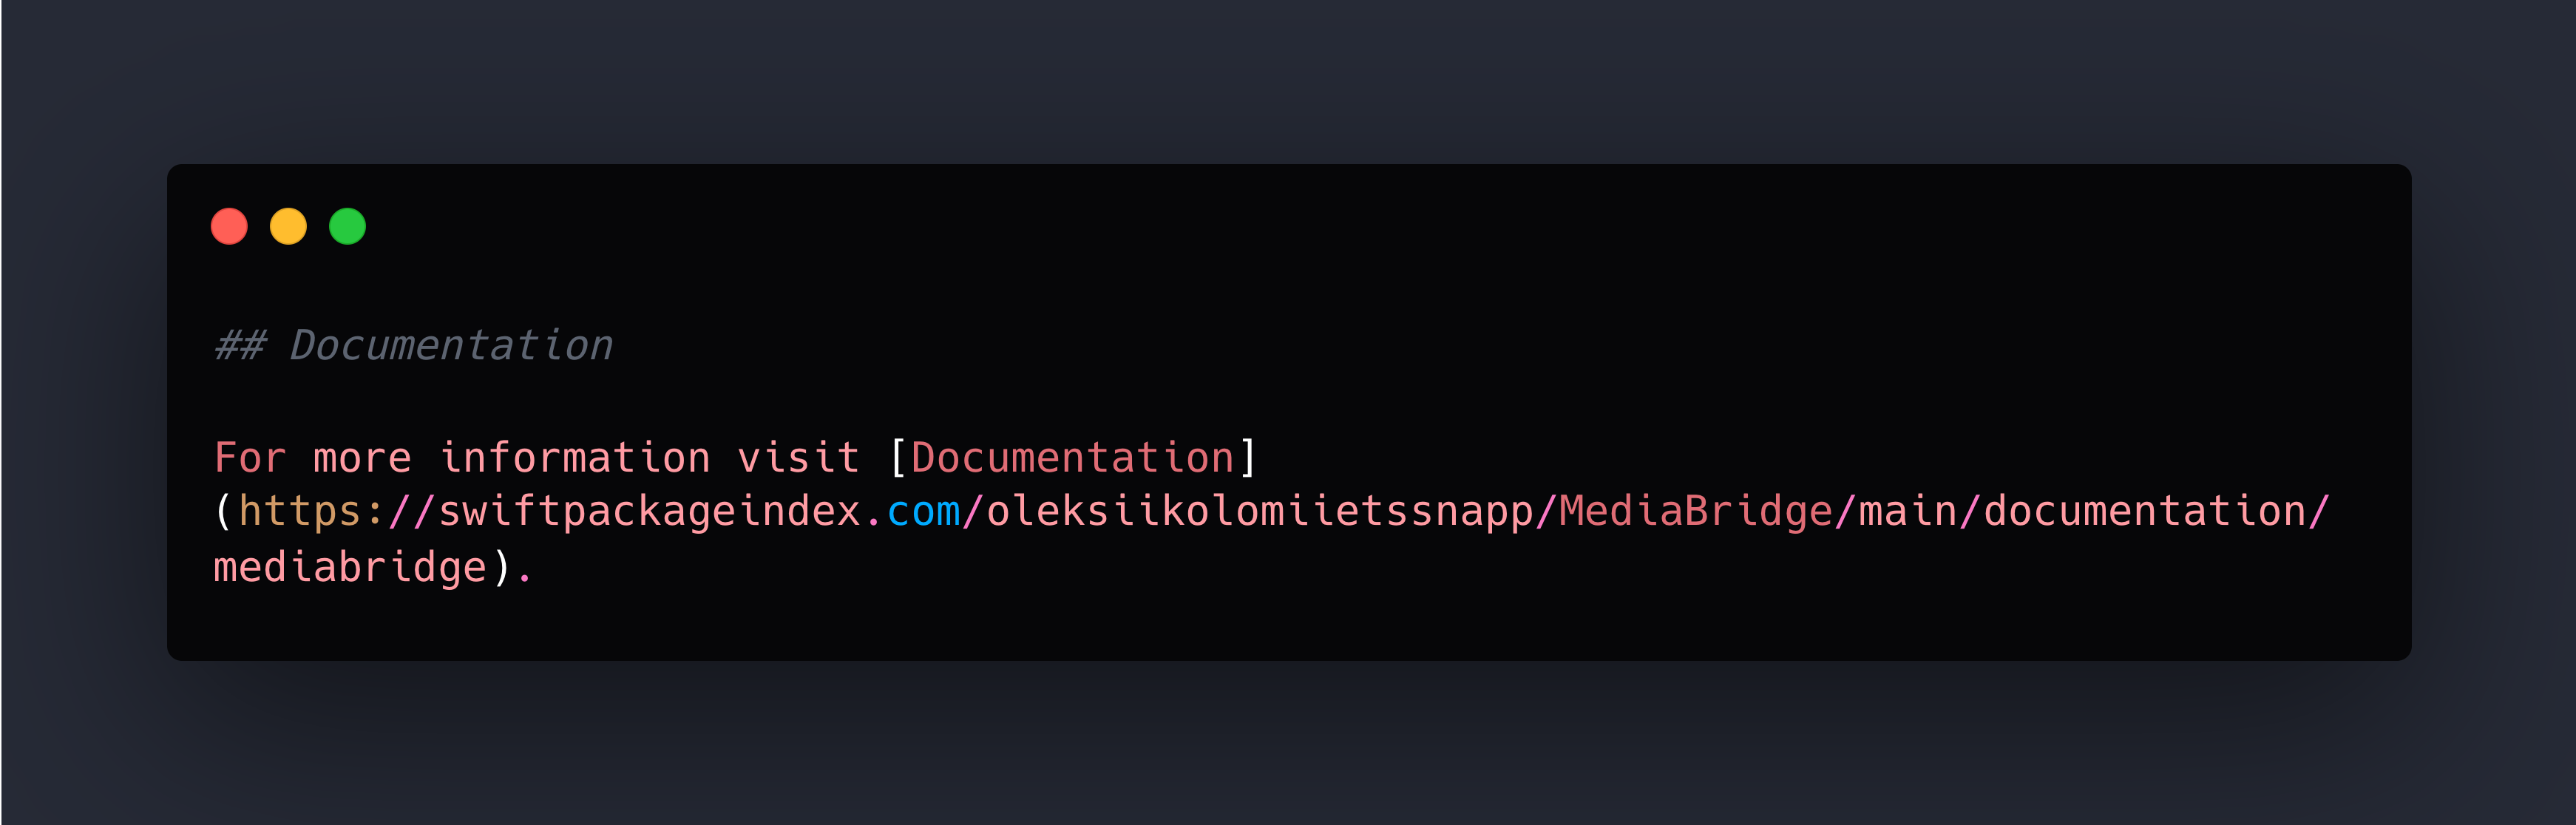
Documentation URL
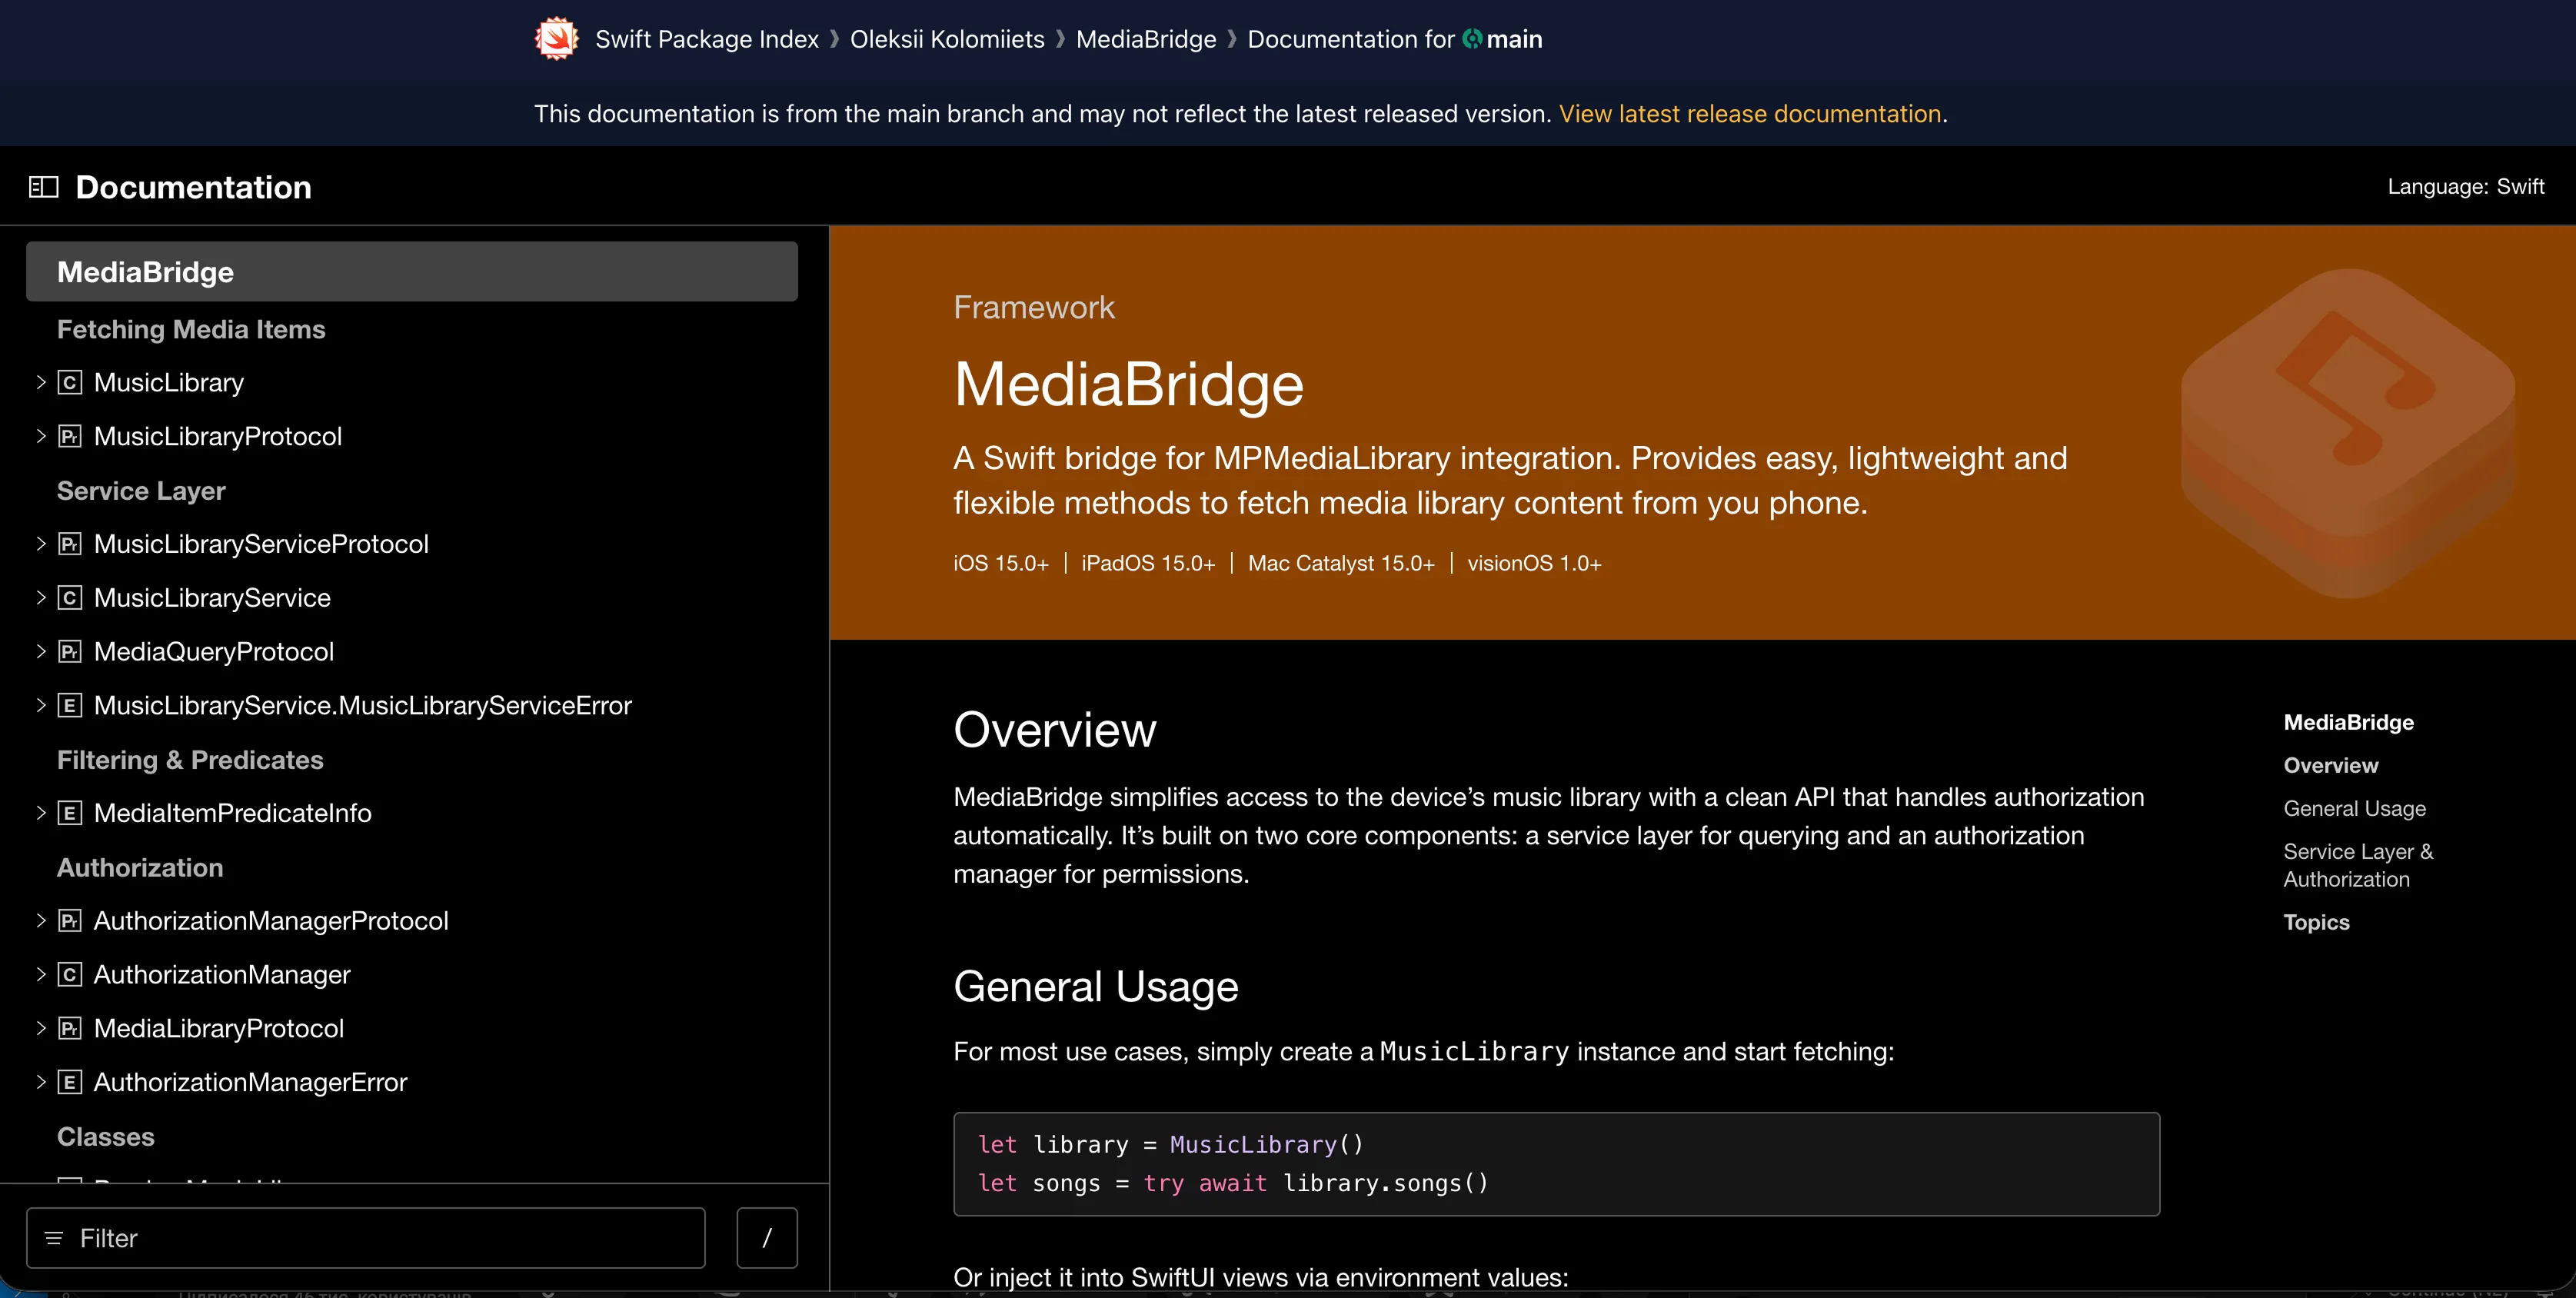
Link this in your README:
Discoverability Benefits
Being on Swift Package Index helps developers find your package through search, categories, trending packages, and quality signals. SPI shows more than just a list — it shows which packages are well-maintained.
Part 3 Checklist: Growth and Ecosystem
- [ ] DocC tutorial for getting started
- [ ] Submit to Swift Package Index
- [ ] .spi.yml configuration for docs hosting
- [ ] Announce on Swift Forums
- [ ] Share on Bluesky and Mastodon
- [ ] Submit to iOS Dev Weekly
- [ ] Add SPI badges to README
Final Thoughts
Building open-source Swift packages is rewarding. Seeing other developers use your work, contribute improvements, and build things you never imagined — that’s the magic of the Swift open-source community.
These practices won’t guarantee success, but they remove the obstacles that prevent success. They make your package discoverable, understandable, and contributable. They signal professionalism and care.
The framework you’ve written deserves to be seen and used. These practices help make that happen.
Now go build something great and share it with the Swift community.
Previous: Part 2: Community and Lifecycle
See also: Part 1: Foundation and Quality
Oleksii Kolomiiets
iOS Developer
Oleksii is an iOS alchemist at Snapp Mobile 📱✨, turning concepts into beautifully crafted Swift code and smooth, user-friendly interfaces. He’s passionate about shaping mobile experiences that feel effortless and refined. A firm believer in the power of simplicity, he focuses on writing clear, thoughtful code that brings ideas to life without unnecessary complexity.


January 6, 2026
Ship It Right: A Swift Package Quality Checklist. Part 3 of 3.
Oleksii Kolomiiets
Parts 1 and 2 established everything you need for a solid, maintainable Swift package: documentation, automated quality checks, contributor-friendly processes, and professional releases. Your package is technically excellent and easy to contribute to.
But here’s the problem: good code doesn’t promote itself.
I’ve experienced this with every project. I spent weeks building SwiftFormatLintPlugin, writing documentation, setting up CI, creating examples. Then I pushed it to GitHub and… waited. Nothing happened. No stars, no issues, no discussions.
This series is for Swift developers turning internal packages into polished public repositories. Parts 1–2 covered documentation, quality, and community. This final part focuses on growth and visibility.
The same code, after I actually shared it on social media, started getting traction. Developers discovered it. The difference wasn’t the code — it was visibility.
You can build the best Swift framework in the world, but if developers don’t know about it, the impact is zero.
Tutorials: Interactive Learning with DocC
We have DocC to create tutorials — quick-starts or how-tos with code and screenshots in a playful way. Tutorials are interactive, step-by-step guides that walk users through actual implementation. They’re more engaging than articles and more structured than example code.
I saw the impact tutorials can have when we added them to SnappTheming. Instead of users asking “how do I get started?” in issues, they will work through the tutorial and show up with specific, advanced questions. The tutorial does the heavy lifting of onboarding.
Tutorials vs Articles
Both are valuable, but they serve different purposes:
Tutorials — “Let’s build something together.” Interactive, step-by-step, with specific outcomes. Best for getting started or learning a workflow.
Articles — “Here’s how this works.” Explanatory, reference-oriented. Best for understanding concepts or exploring features.
Use tutorials for getting started guides, common integration patterns, and building complete examples. Use articles for API reference, architecture explanations, and configuration guides.
When to Create Tutorials
Create tutorials for getting started (every framework should have one), common patterns (frequent integration scenarios), and complex features (anything taking more than a few lines to set up).
Don’t create tutorials for every single API method (that’s what articles are for), edge cases, or internal implementation details.
The Playful Advantage
Tutorials are playful in a way that API documentation isn’t. Users actively build something, see results at each step, and feel progress. This builds confidence and engagement.
I’ve seen users work through tutorials and then immediately integrate the framework into their projects. The tutorial gave them enough confidence to commit. That’s the power of interactive learning.
If you want users to quickly grasp your framework and start using it confidently, tutorials are one of the highest-value investments you can make.
Promotion: Good Code Doesn’t Promote Itself
You built something valuable. Now make sure the people who need it can find it. This isn’t about being pushy or spammy. It’s about respectfully connecting your work with developers who have the problems your tool solves.
The Problem: The Silent Launch
I made this mistake with my first few open-source tools. I’d build something useful, write great documentation, push to GitHub, and wait for people to discover it. They didn’t.
GitHub has millions of repositories. Nobody randomly discovers your package through divine intervention. You have to tell people it exists.
The tools that succeeded were the ones I actually promoted: posting to Swift forums, sharing on social media, submitting to newsletters. Same code quality, different outcomes — all because of visibility.
Where to Share
Social media works best when you meet developers where they already hang out. The Swift community is active and engaged on Bluesky and Mastodon, making both great places to share updates and start conversations. LinkedIn has also become surprisingly effective lately, especially for reaching professionals who care about real-world usage and product decisions.
Share launch announcements with clear screenshots or short demo GIFs. Post about major releases, highlight interesting features, and show practical usage examples. Focus on being informative rather than promotional — developers value clarity and substance. Use relevant hashtags to help the right people find your posts:
Newsletters
There are a bunch of good newsletters. Submit your project through their submission form. Getting featured exposes your tool to thousands of iOS developers. If there is no form, do some research and find the newsletter’s social accounts to send a direct message.
Submit when you launch version 1.0, add significant new features, or have an interesting technical write-up about building it.
Relevant subreddits: r/swift and r/iOSProgramming. Reddit appreciates substance. Don’t just drop a link — explain what problem you’re solving and why you built it. Engage with comments.
Technical Blogs
Write about building your tool: technical challenges you solved, design decisions you made, lessons learned. Post on Dev.to, Medium, your personal blog, or company engineering blog. These articles serve dual purposes: they promote your tool and provide valuable content to the community.
How to Announce: Simple, Clear, Honest
When announcing:
- Lead with the problem — What does this solve?
- Show, don’t just tell — Include a code example, screenshot, or demo
- Link to documentation — Make it trivial to learn more
Example announcement of CounterPicker:
Ongoing Engagement
Promotion isn’t just the launch. Stay engaged: answer questions promptly, share updates when you ship significant releases, highlight community contributions publicly, and write follow-up content.
What Not to Do
Don’t spam (posting to 10 subreddits is spam), don’t beg for stars, don’t over-promote every minor commit, don’t be defensive about critical feedback, and don’t make promises you can’t keep.
You Built Something Valuable — Share It
You invested time building a tool that solves a real problem. The final step is making sure the developers who need it know it exists.
Promotion isn’t self-aggrandizement. It’s connecting your solution with people who have the problem it solves. Share your work. The community wants to know about it.
Swift Package Index: Free Documentation Hosting
There’s a free way to have documentation hosted at Swift Package Index. You need to register your framework at their GitHub and meet their expectations with an spi.yml file. This gets you professional documentation hosting without paying for servers.
I host documentation for my packages on Swift Package Index. It’s free, reliable, and integrates perfectly with the Swift ecosystem.
The Swift Package Index team reviews submissions (usually within a day) and merges if your package meets basic requirements: valid Swift package with Package.swift, public repository, and semantic versioning tags.
This tells Swift Package Index which targets to build documentation for, what platform to build on, and what Swift version to use.
Documentation updates automatically when you push new release tags.
Documentation URL
Link this in your README:
Discoverability Benefits
Being on Swift Package Index helps developers find your package through search, categories, trending packages, and quality signals. SPI shows more than just a list — it shows which packages are well-maintained.
Part 3 Checklist: Growth and Ecosystem
- [ ] DocC tutorial for getting started
- [ ] Submit to Swift Package Index
- [ ] .spi.yml configuration for docs hosting
- [ ] Announce on Swift Forums
- [ ] Share on Bluesky and Mastodon
- [ ] Submit to iOS Dev Weekly
- [ ] Add SPI badges to README
Final Thoughts
Building open-source Swift packages is rewarding. Seeing other developers use your work, contribute improvements, and build things you never imagined — that’s the magic of the Swift open-source community.
These practices won’t guarantee success, but they remove the obstacles that prevent success. They make your package discoverable, understandable, and contributable. They signal professionalism and care.
The framework you’ve written deserves to be seen and used. These practices help make that happen.
Now go build something great and share it with the Swift community.
Previous: Part 2: Community and Lifecycle
See also: Part 1: Foundation and Quality
Oleksii Kolomiiets
iOS Developer
Oleksii is an iOS alchemist at Snapp Mobile 📱✨, turning concepts into beautifully crafted Swift code and smooth, user-friendly interfaces. He’s passionate about shaping mobile experiences that feel effortless and refined. A firm believer in the power of simplicity, he focuses on writing clear, thoughtful code that brings ideas to life without unnecessary complexity.