
January 5, 2026
Ship It Right: A Swift Package Quality Checklist. Part 2 of 3.
Oleksii Kolomiiets

In Part 1, we built the foundation: documentation, tests, automated quality checks. Your Swift package is technically solid. The code works, it’s well-documented, and it maintains consistent quality.
Now comes the shift: from “my code works” to “others can contribute.”
This series is for Swift developers turning internal packages into polished public repositories. Part 1 covered documentation and quality. This part focuses on community and lifecycle.
This is where many solo-developed projects stumble. The code is great, but there’s no clear path for contributions. Issues pile up without organization. Releases happen chaotically. The infrastructure that worked for solo development doesn’t scale to community development.
The gap isn’t technical — it’s process. You need infrastructure for guiding contributions, managing work, communicating changes, and shipping professional releases.
The first time someone outside your organization contributes to your project is special. They took time to understand your code, fix something, and send it back. Make their experience smooth. A clear contribution path, simple templates, and responsive feedback turn one-time contributors into regular contributors.
The infrastructure we’re building isn’t bureaucracy — it’s hospitality. It shows contributors that you value their time and want to make contributing easy.
PR and Issue Templates: Keep Them Simple
Here’s my philosophy on templates: they should be easy and optional. PR templates with fifteen sections and required checkboxes don’t increase quality — they discourage contributions. Three sections are enough.
I learned this watching pull requests to my own projects. Early on, I created comprehensive templates with sections for “Testing Strategy,”
“Performance Implications,” “Breaking Changes,” “Documentation Updates,” and more. Nobody filled them out completely. Contributors would either skip most sections or write “N/A” repeatedly, which helped nobody.
Now I use minimal templates that guide without overwhelming. Contributions increased because the barrier to entry dropped.
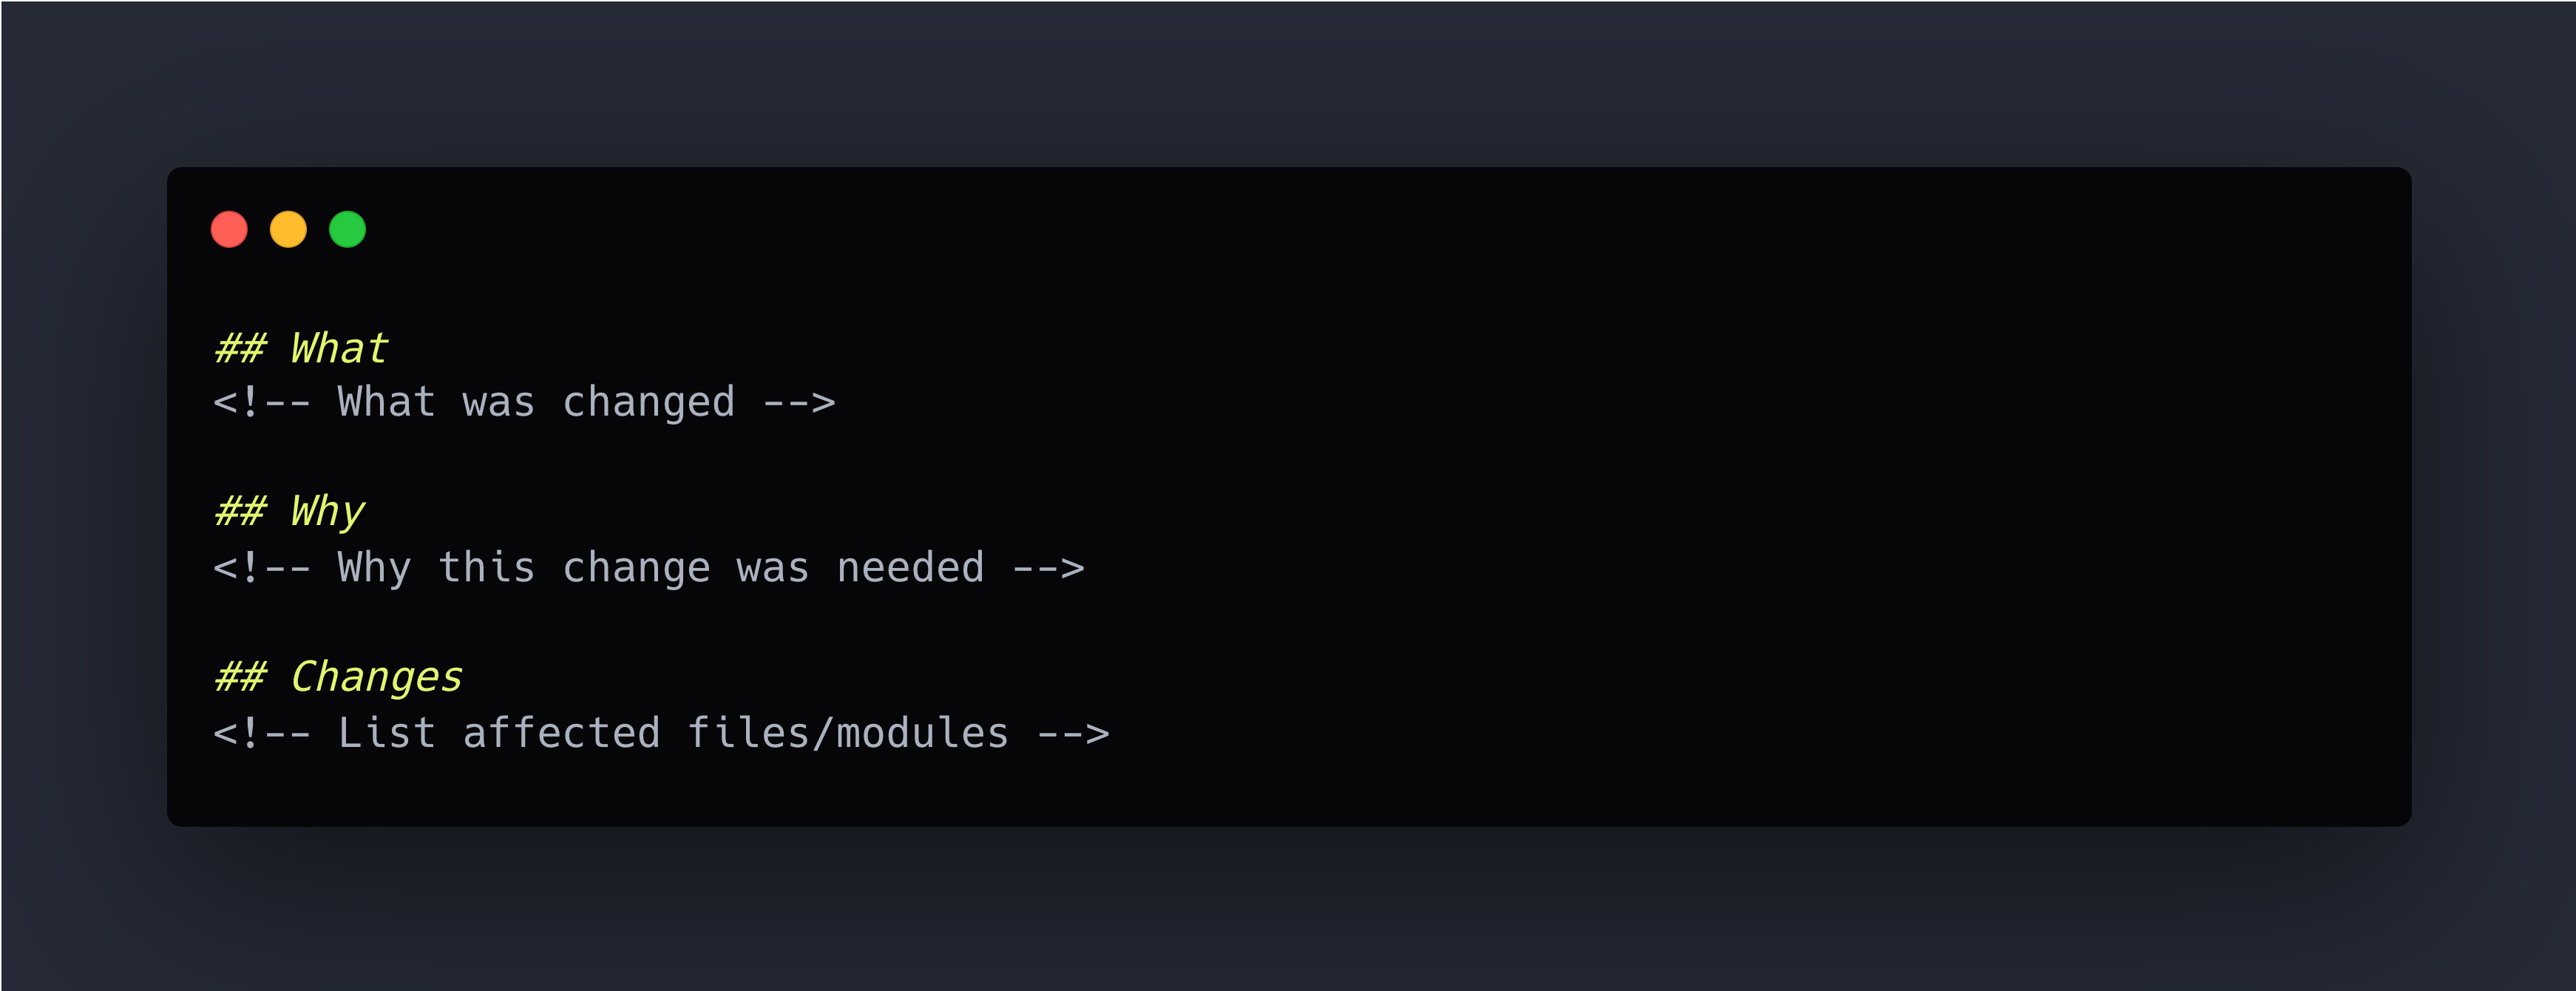
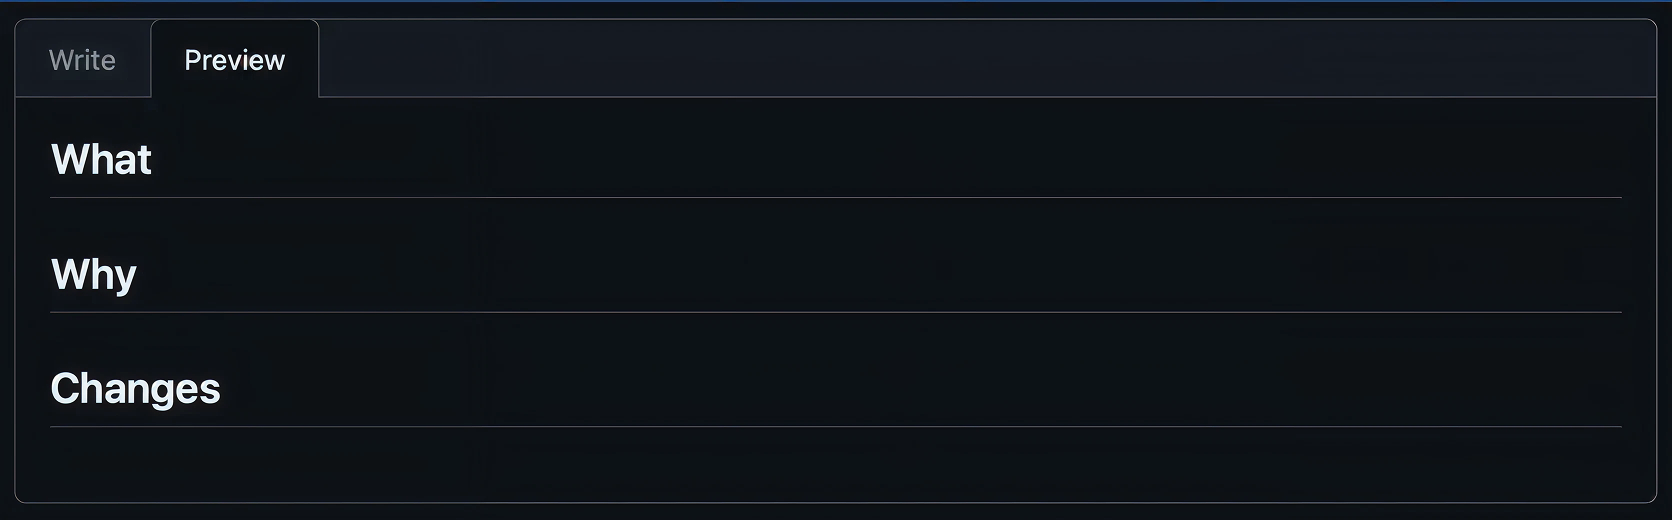
The Simple PR Template
Create .github/pull_request_template.md in your repository:
Issue Templates
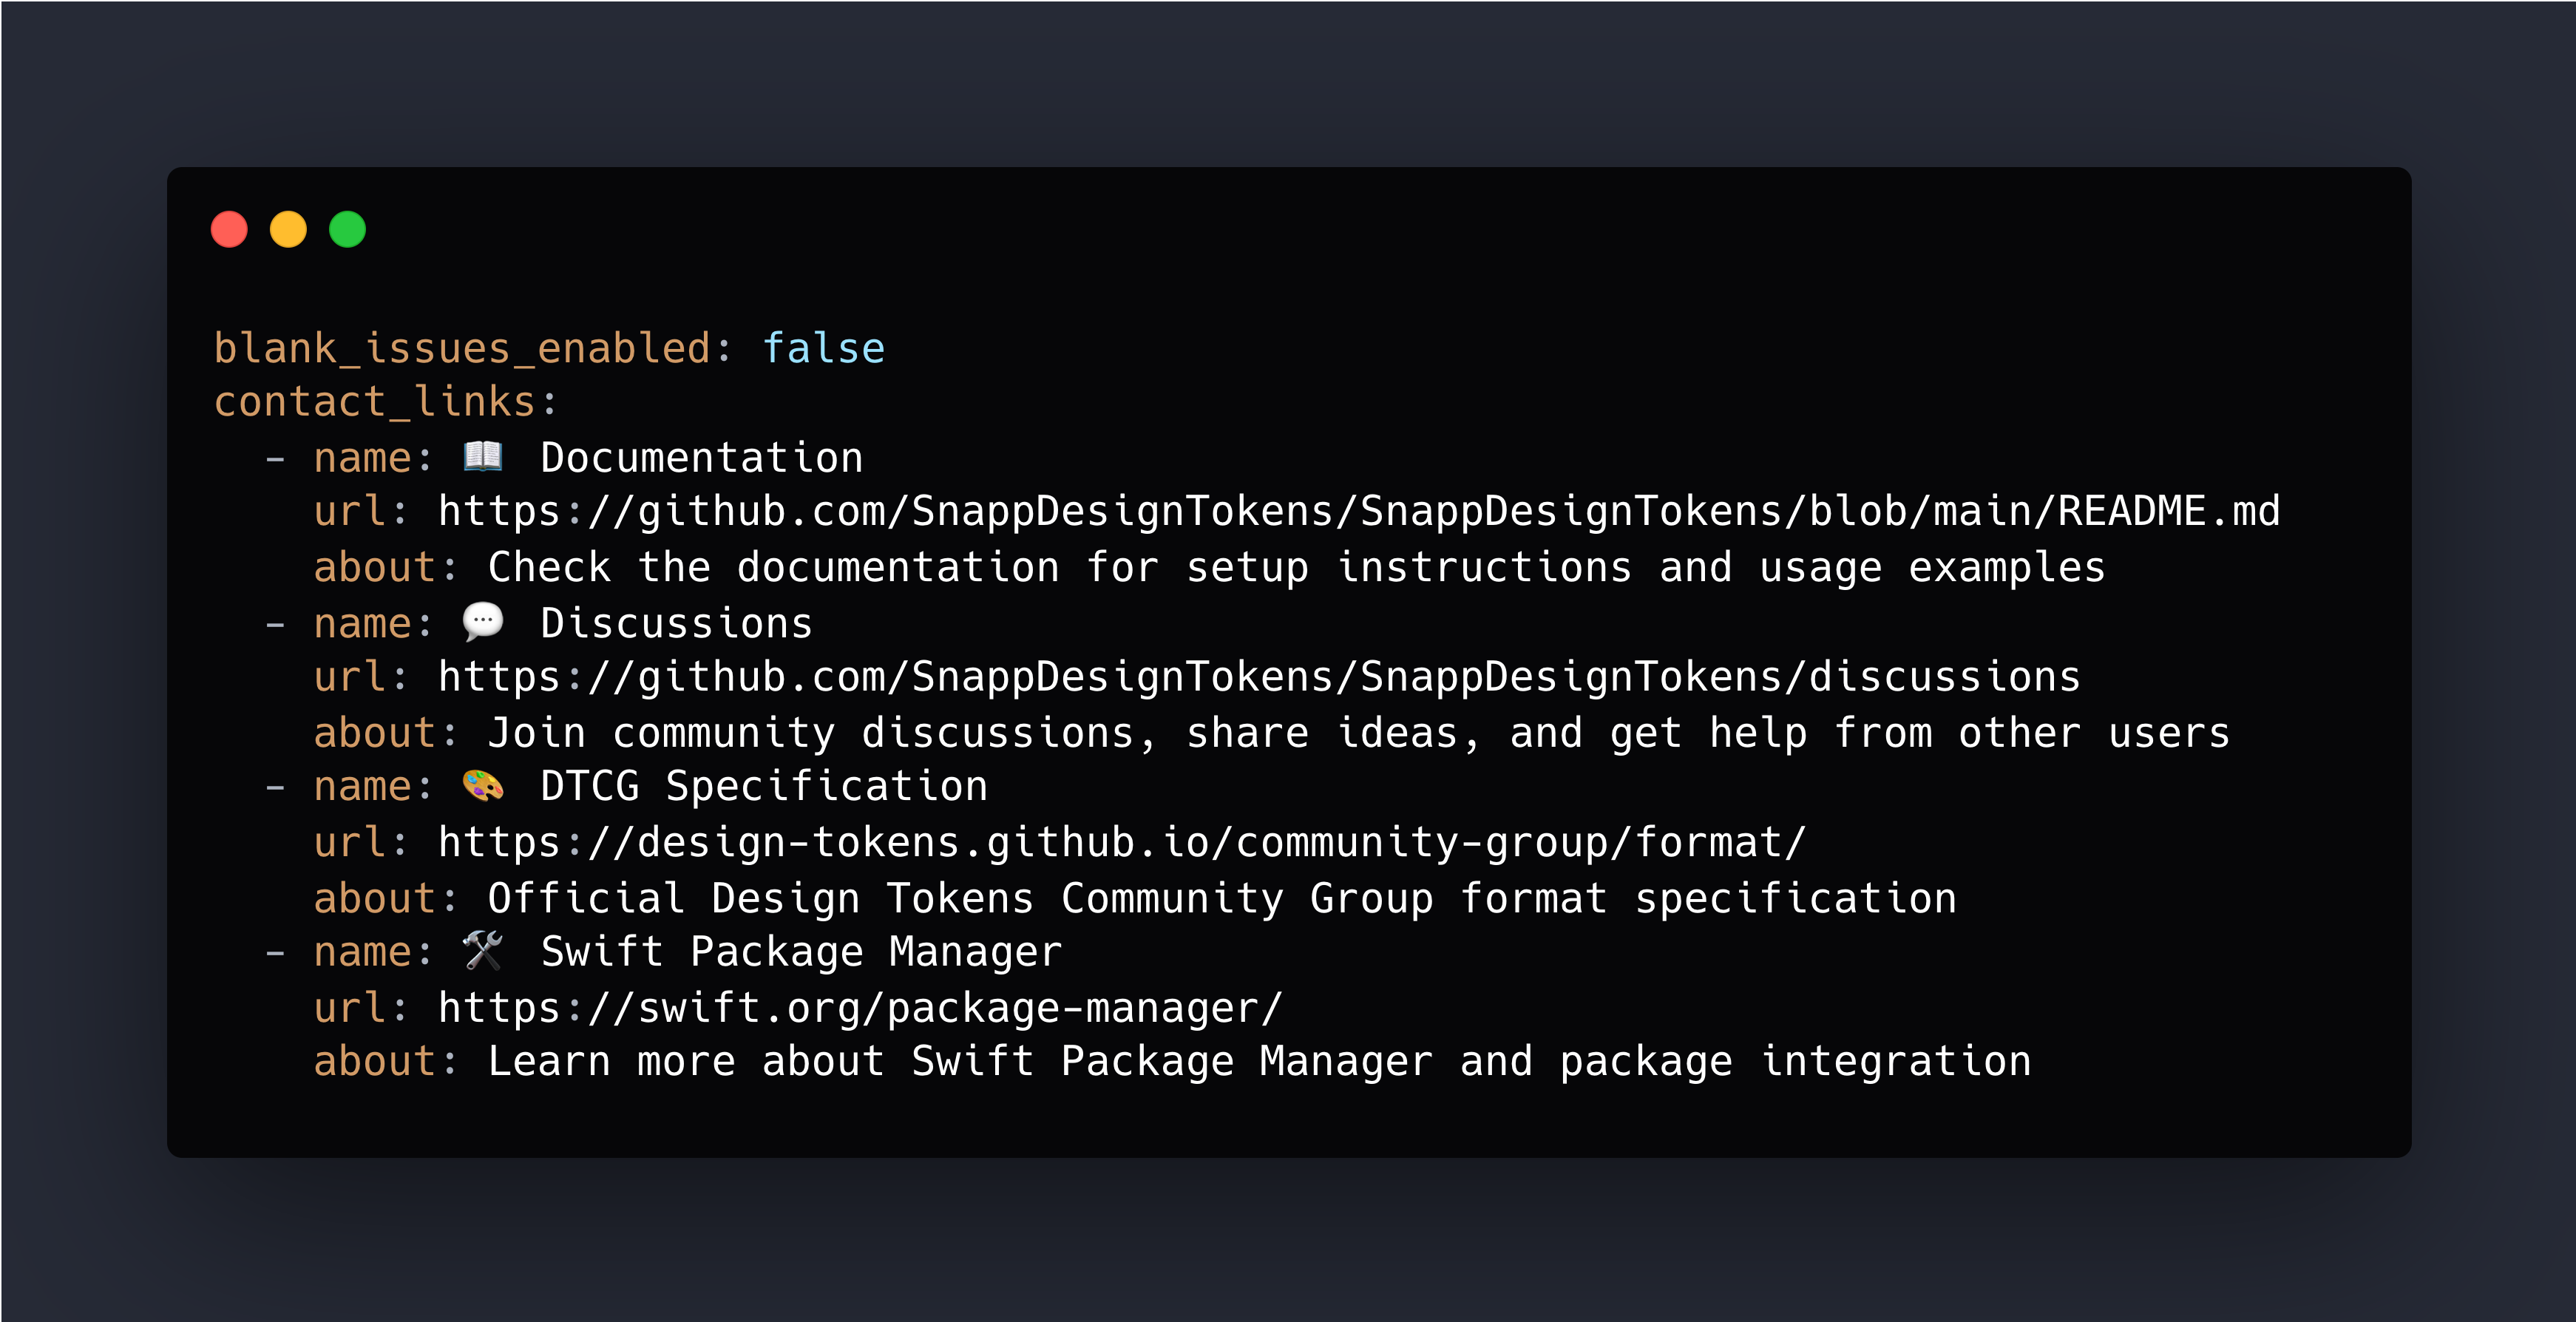
For issue templates, see this example: SnappDesignTokens.
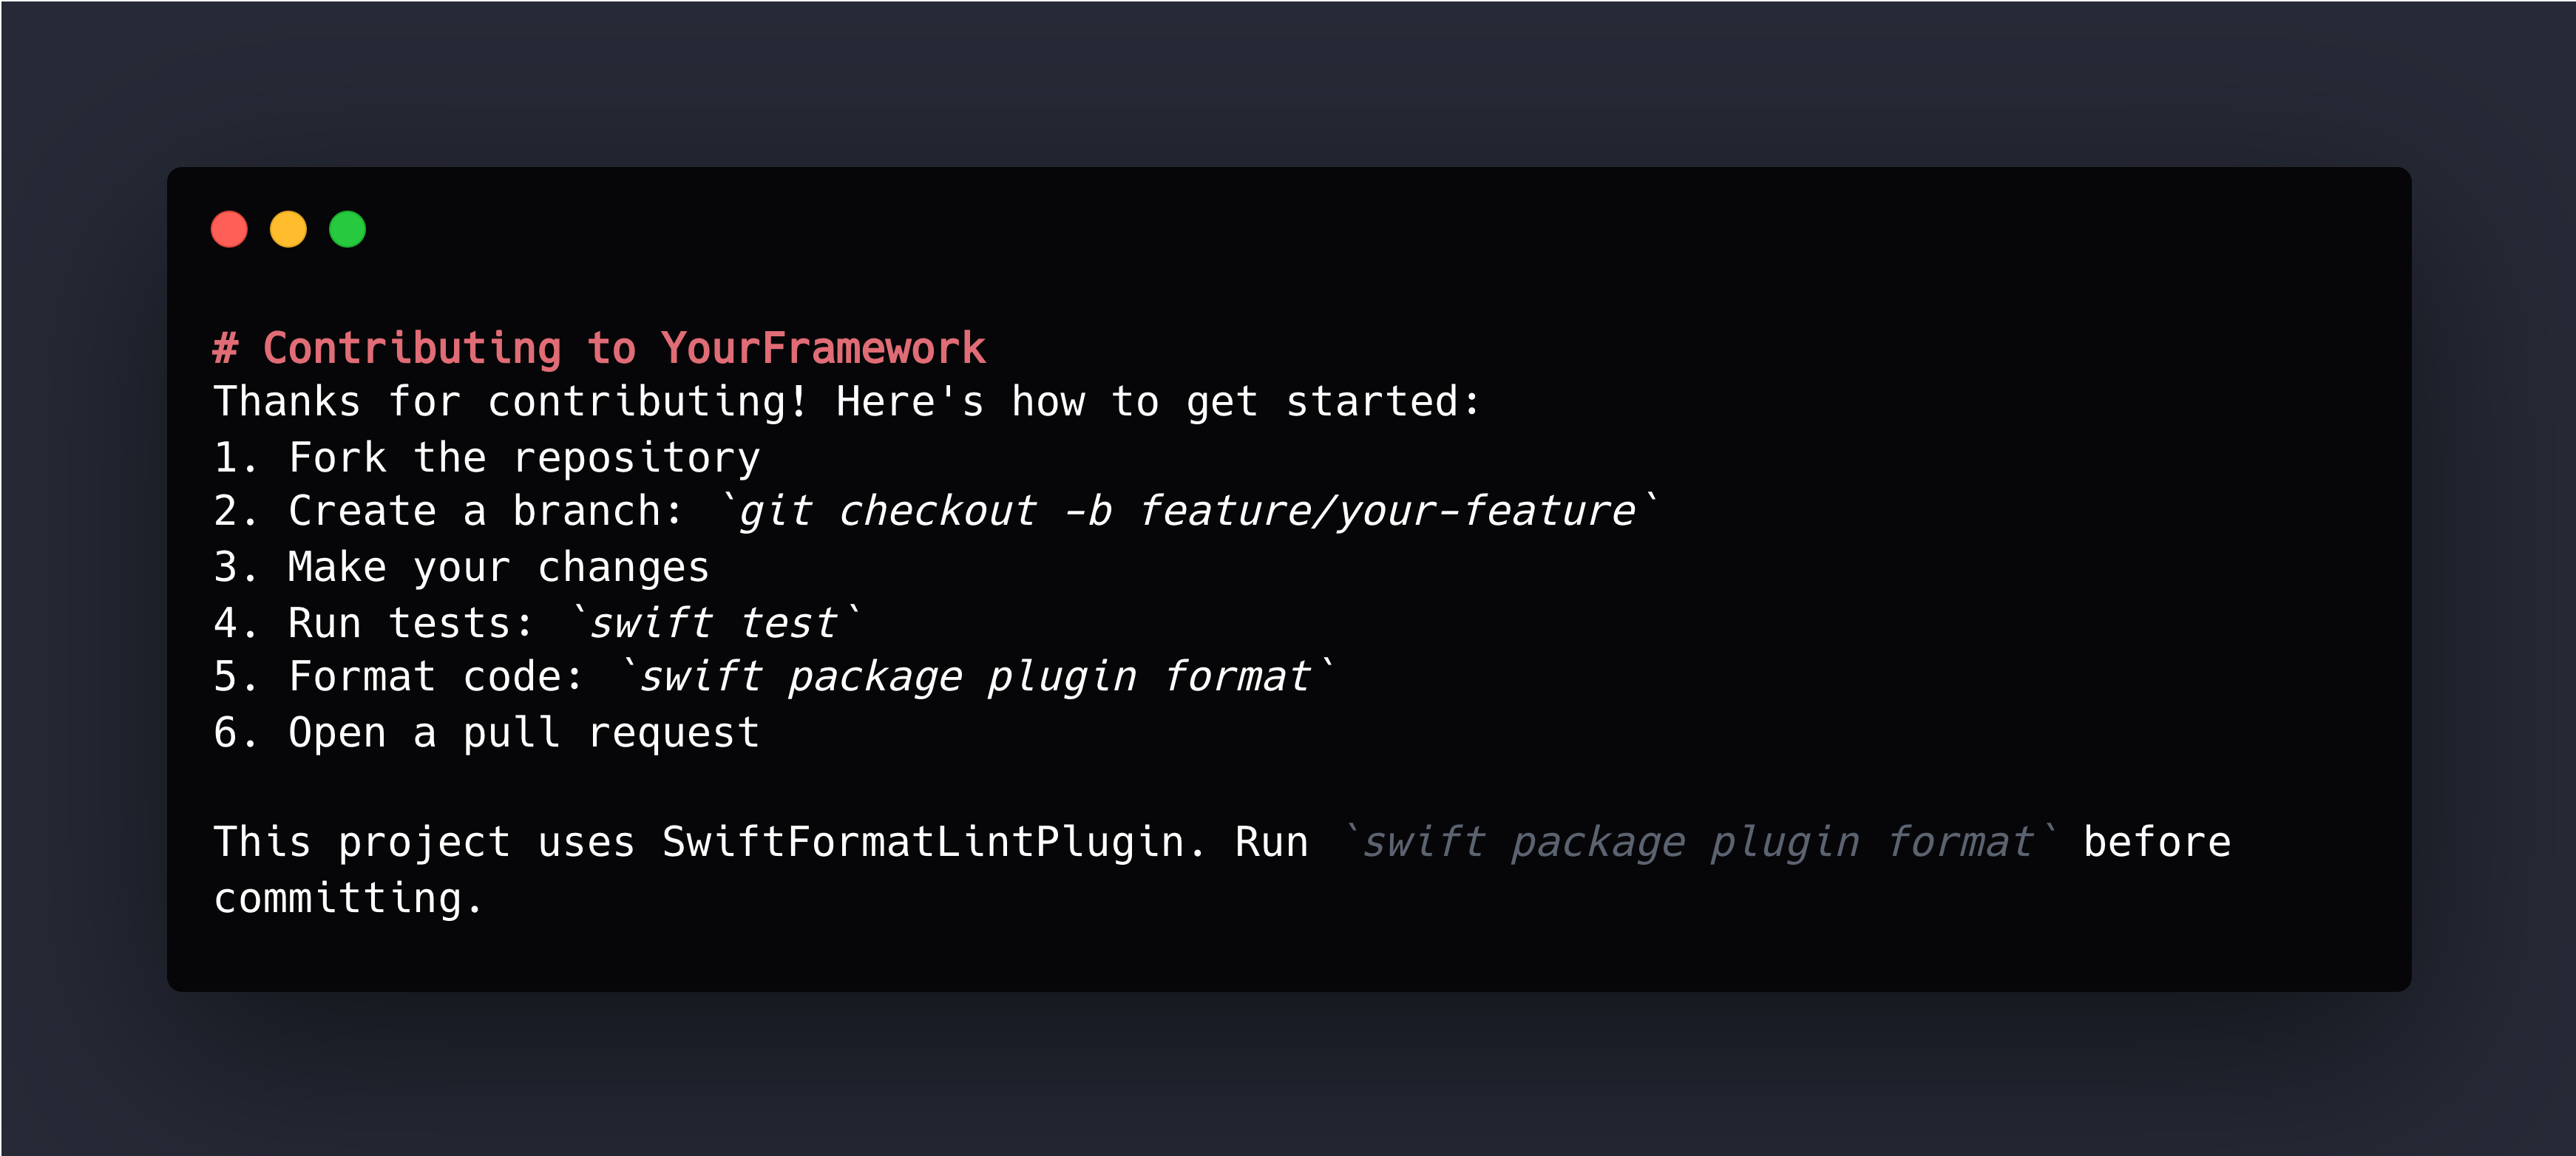
CONTRIBUTING.md
Create a brief CONTRIBUTING.md that welcomes contributors and points to essentials:
The Philosophy
Templates exist to help contributors provide useful context, not to enforce process for process’s sake. I’d rather get a PR with minimal template completion but good code than scare away a contributor with a 15-section form. You can ask for clarification during review. You can’t rescue a contribution that never happened because the process felt like too much work.
Issue Management: Planning Beats Stale Ideas
Issues aren’t just for bug tracking. They’re your public roadmap, your planning tool, and your communication channel with users.
An idea without a plan becomes a stale issue. Planning turns ideas into action.
Label Strategy: Keep It Simple
- bug — Something is broken
- enhancement — New feature or improvement
- documentation — Docs need updating
- help wanted — Good for contributors
Milestones: Group by Version
- 1.0.0 — Issues planned for initial release
- 1.1.0 — Issues for first feature update
- 2.0.0 — Breaking changes for next major version
- Future — Ideas we like but haven’t scheduled
Avoiding Stale Issues
Stale issues make repositories look abandoned. Combat this with regular triage.
For stale issues:
This issue hasn’t had activity in 6 months. Is this still relevant? If we don’t hear back in 2 weeks, we’ll close this to keep the issue tracker focused.
For won’t-fix issues:
Thanks for the suggestion. After discussion, we’ve decided not to pursue this because [specific reason]. Closing as wontfix, but appreciate you taking the time to open this issue.
Communication Through Issues
Issues are public communication. How you respond matters:
- Be welcoming: “Thanks for reporting this! I’ll investigate.”
- Be clear about timing: “I won’t have time to look at this until next month, but PRs welcome.”
- Be honest about priorities: “This is a nice idea but not currently on the roadmap. Would love a PR if you’re interested.”
- Close decisively: If you won’t fix something, say so and close it.
An issue is valuable only if it has a path forward. If an issue has no path forward, close it. You can always reopen if circumstances change.
CHANGELOG.md: Simple Version History
A changelog lists what changed in each version. Users need to know what changed between versions, especially when deciding whether to upgrade.
I keep a CHANGELOG.md in every repository. When I cut a release, I update the changelog. When users ask “what changed in 1.2.0?”, we can point them to the changelog.
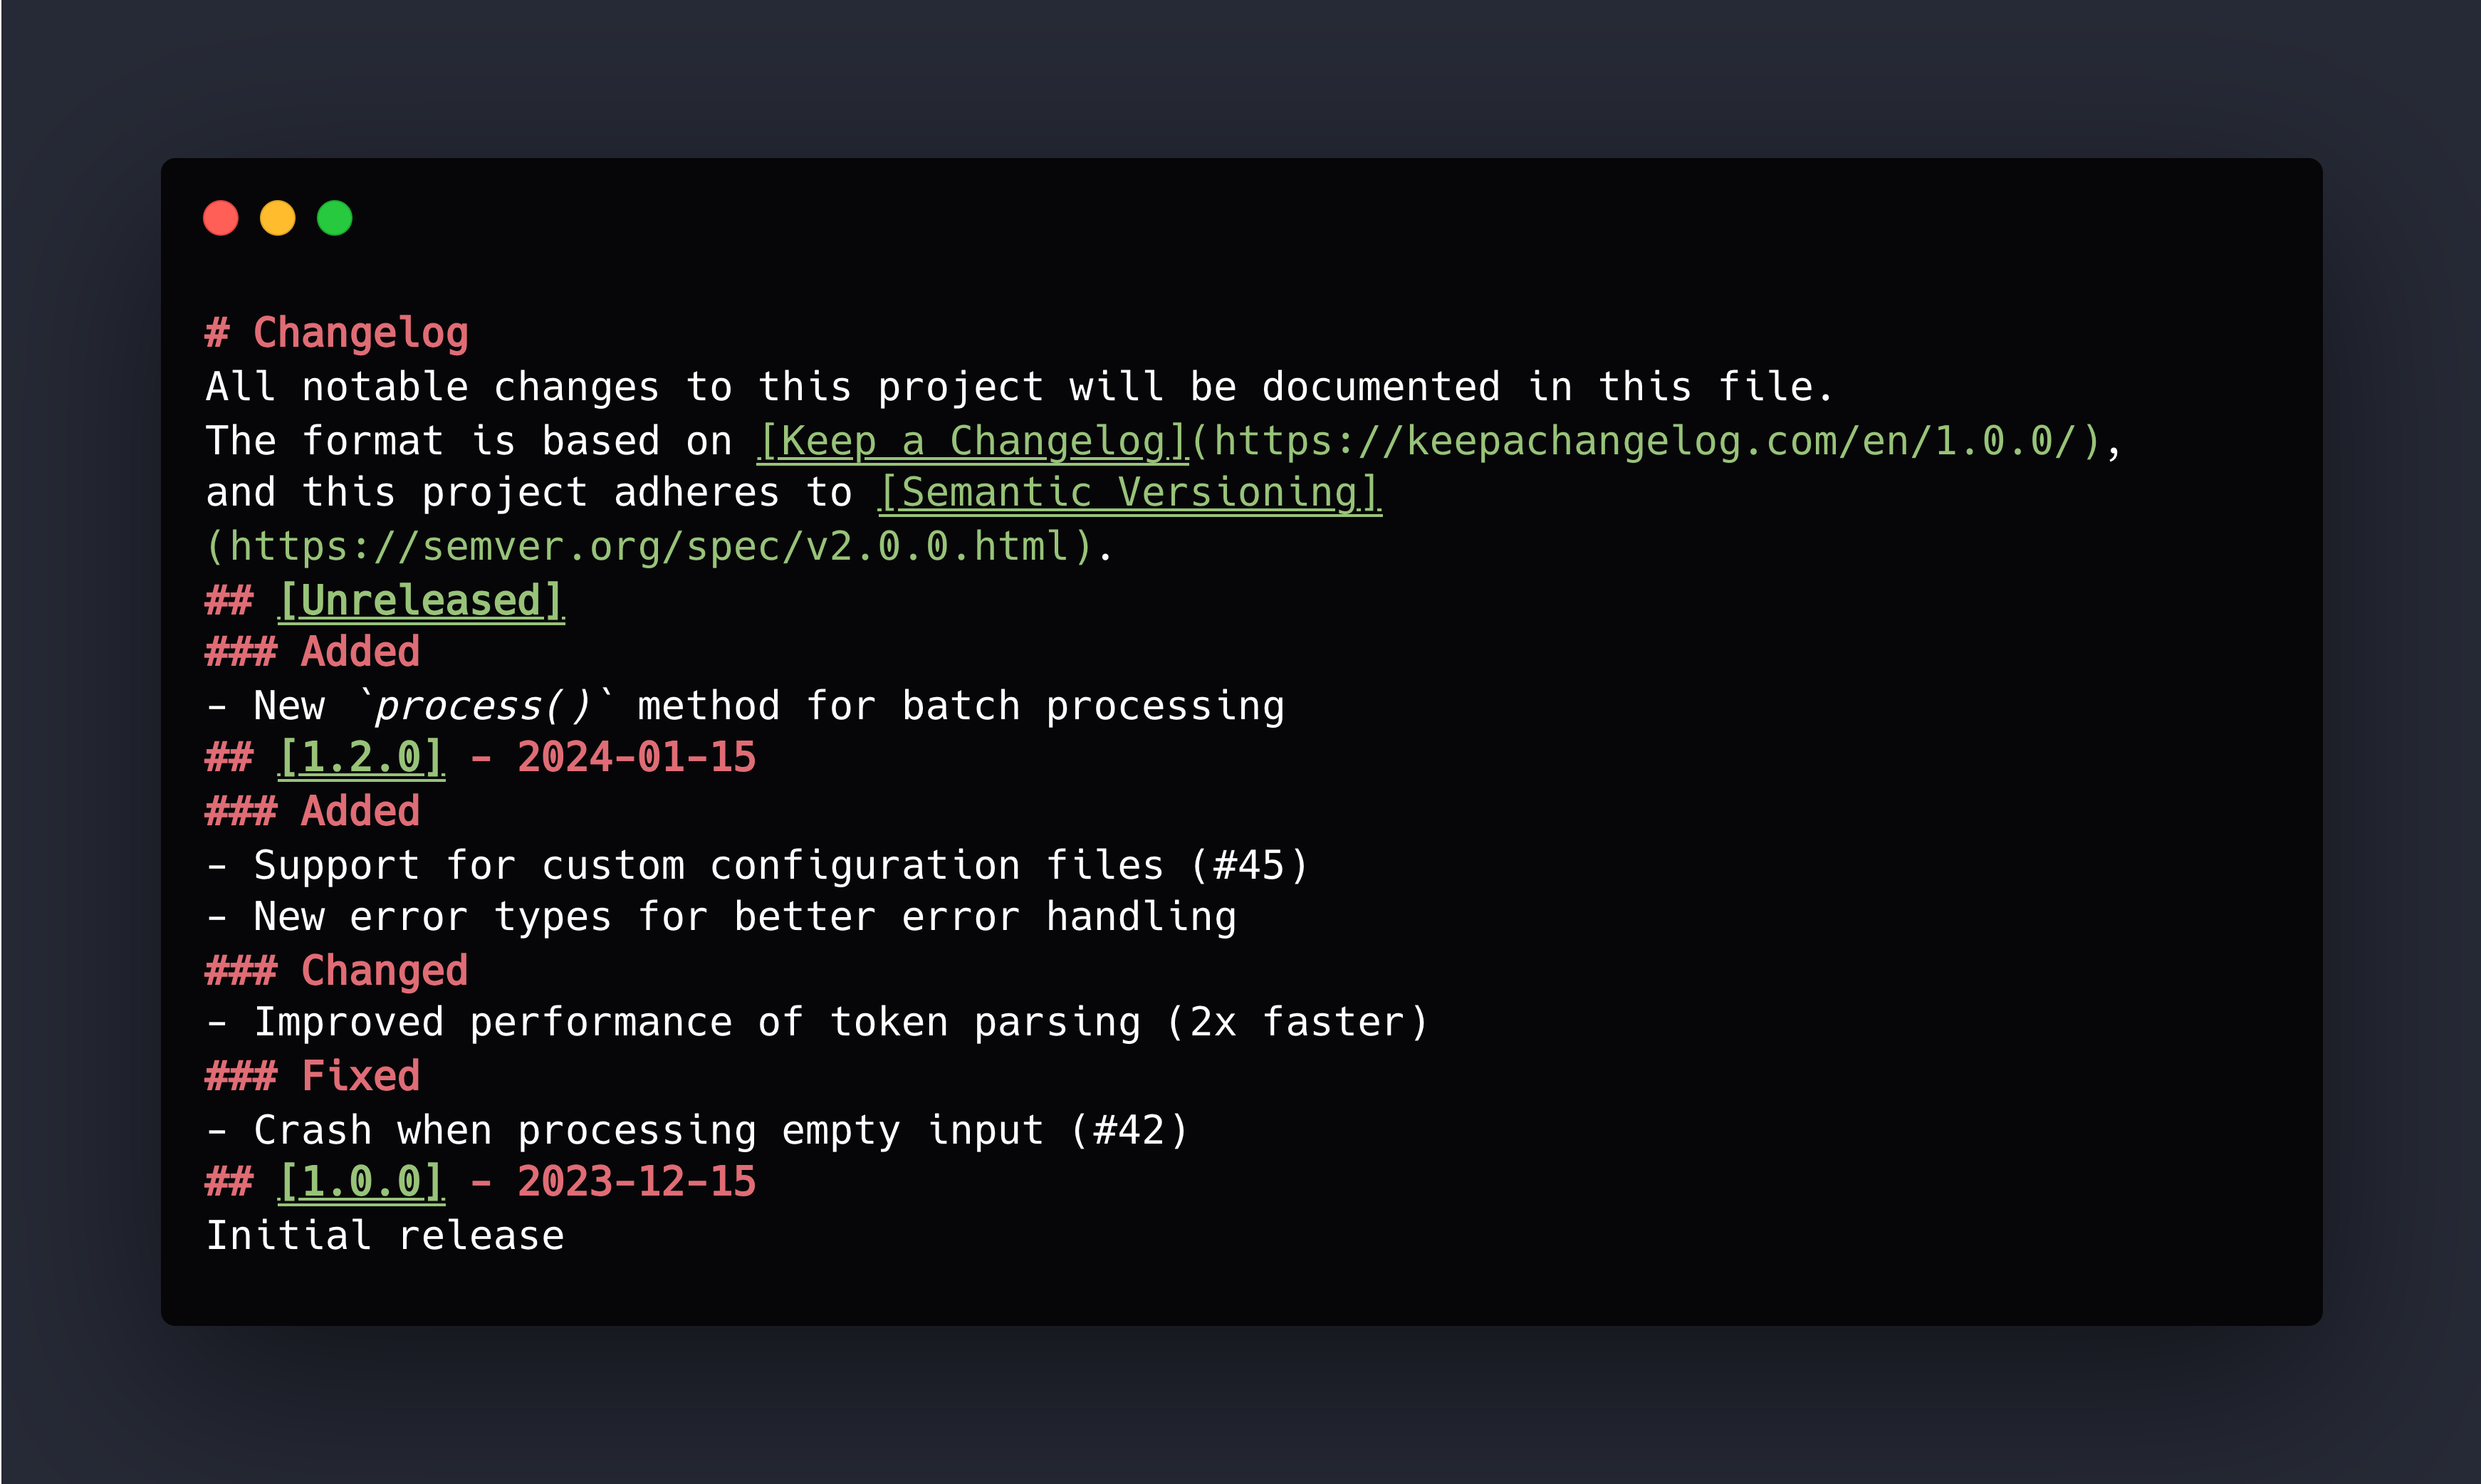
Categories: Added, Changed, Deprecated, Removed, Fixed, Security. Not every release needs every category. Use what’s relevant.
Keeping It Updated
Update the changelog as you merge changes, not at release time. When you merge a PR:
- If it adds a feature, add an entry under [Unreleased] → Added
- If it fixes a bug, add an entry under [Unreleased] → Fixed
- If it’s a breaking change, add an entry under [Unreleased] → Changed
This is easier than trying to remember everything at release time.
Integration With Releases
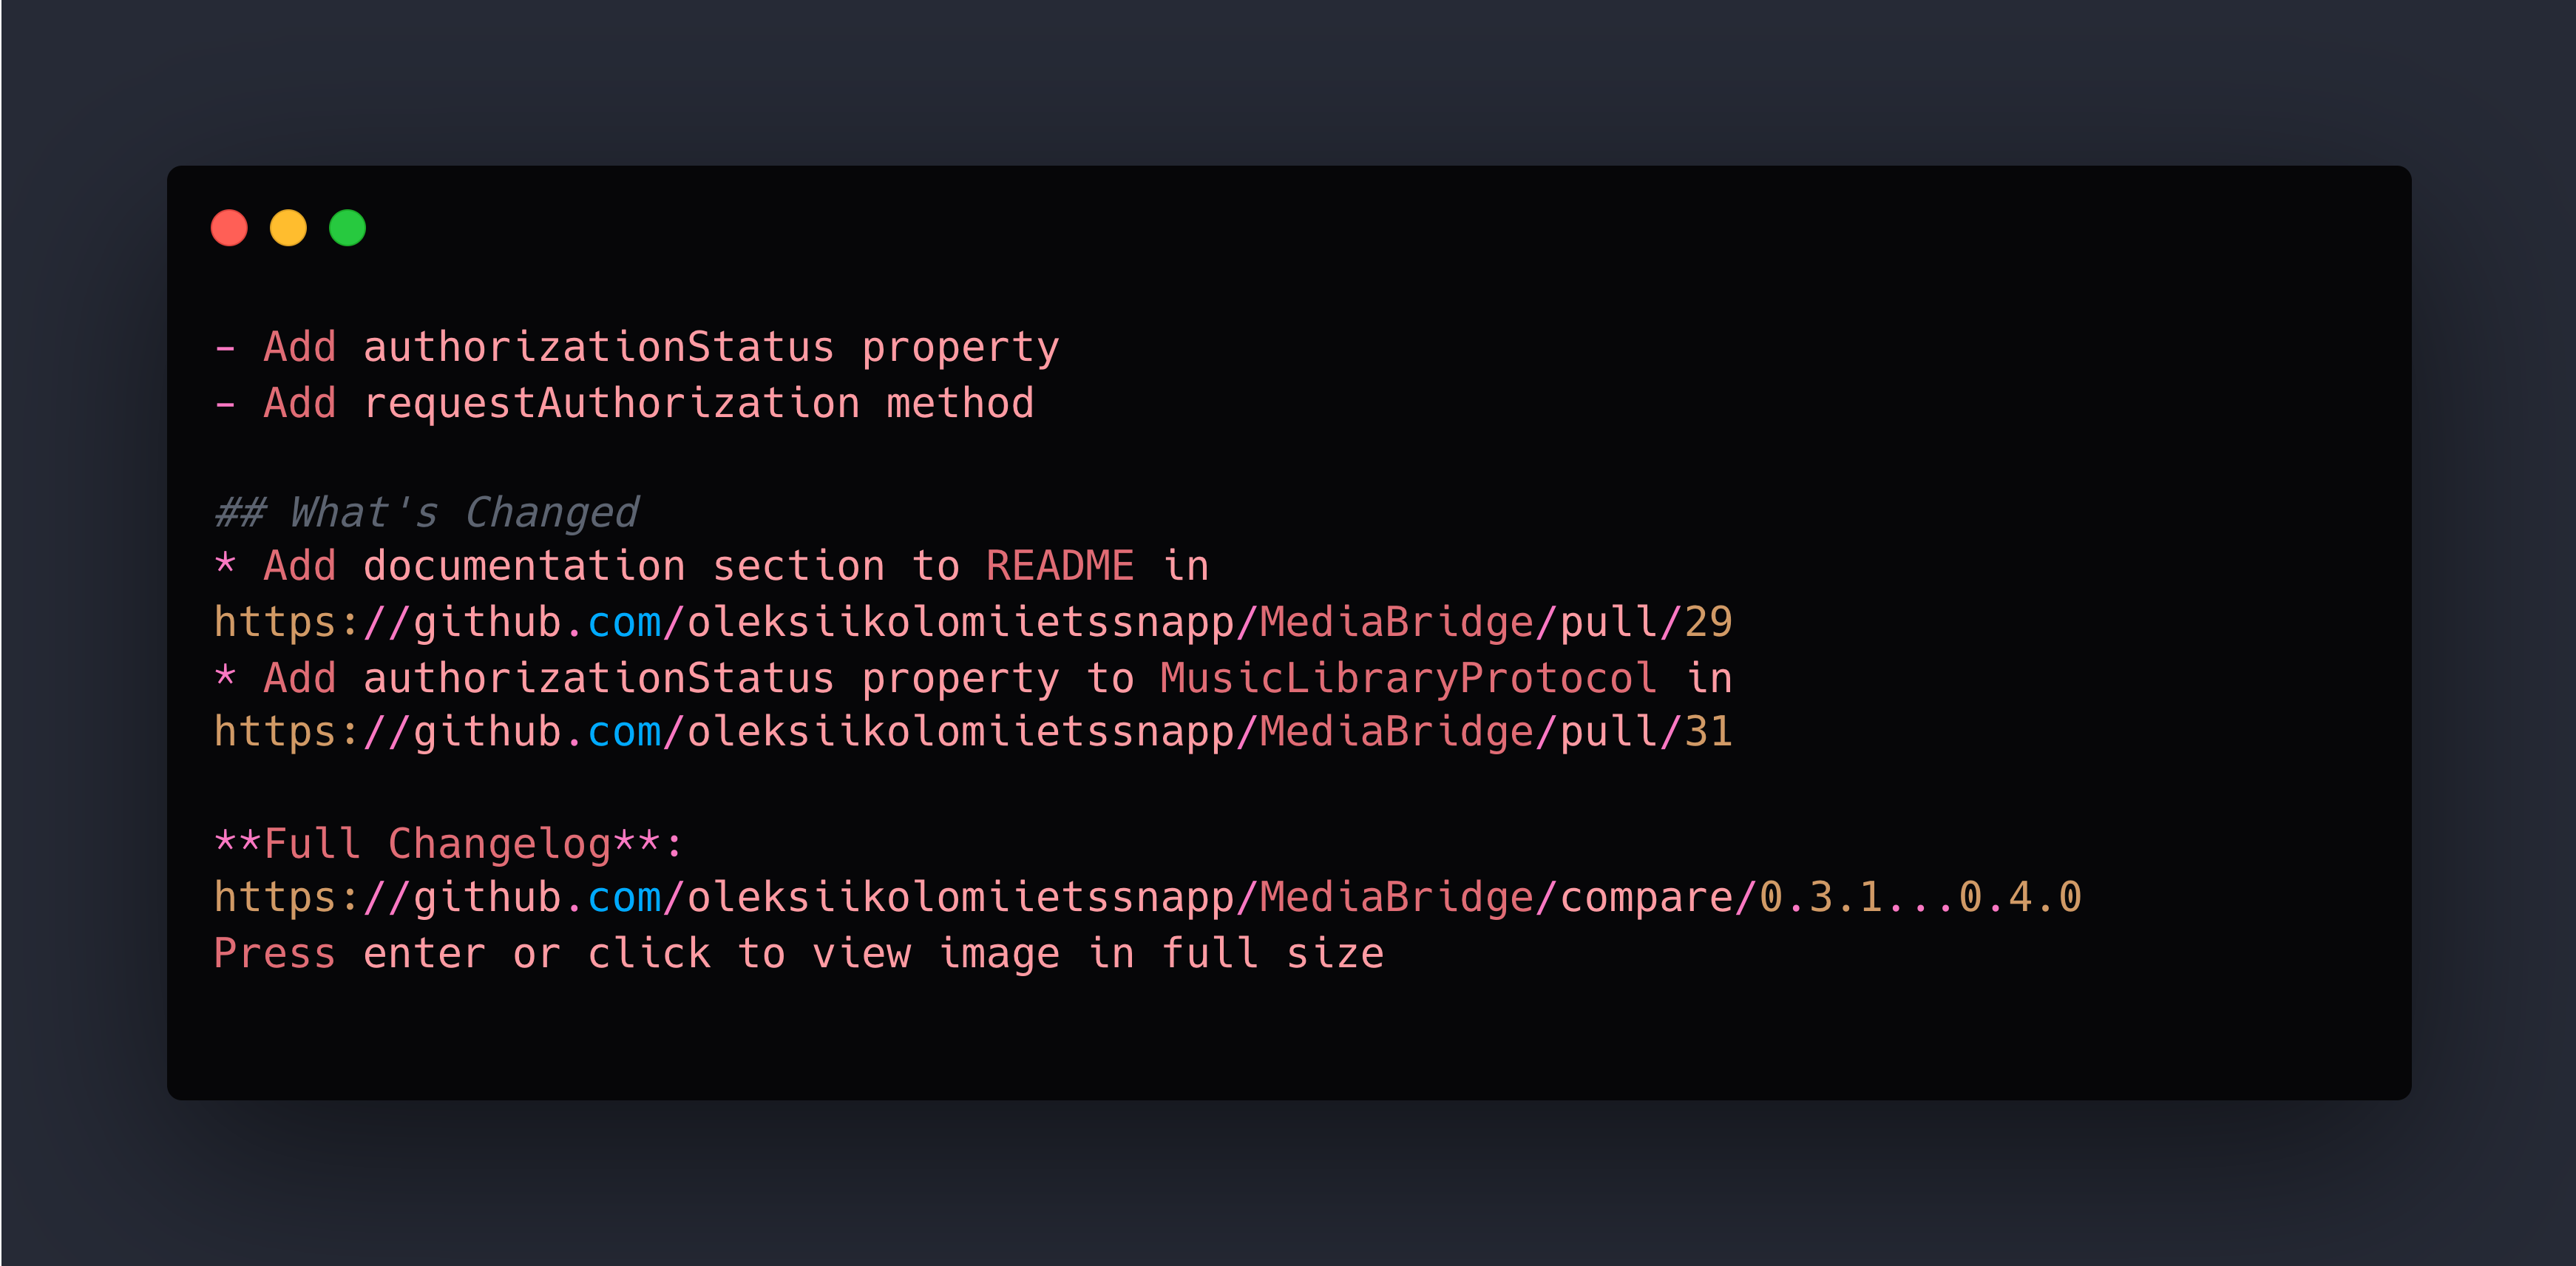
When you create a GitHub Release, copy the changelog entry into the release notes:

Releases and Tags: Semantic Versioning Made Easy
Releases communicate stability and progress. A well-managed release process tells users “this version is stable and ready” while giving them clear expectations about what changed.
For Swift Package Manager projects, tags are particularly important — they’re how users specify which version of your package to use.
Semantic Versioning
SemVer uses three numbers: MAJOR.MINOR.PATCH
- MAJOR — Breaking changes that require users to modify their code
- MINOR — New features, backward-compatible additions
- PATCH — Bug fixes, no API changes
This convention sets clear expectations. When I see 1.2.3 to 1.2.4, I know it’s safe. When I see 1.2.4 to 2.0.0, I know to check the changelog.
Creating Git Tags
Tags mark specific commits as releases:
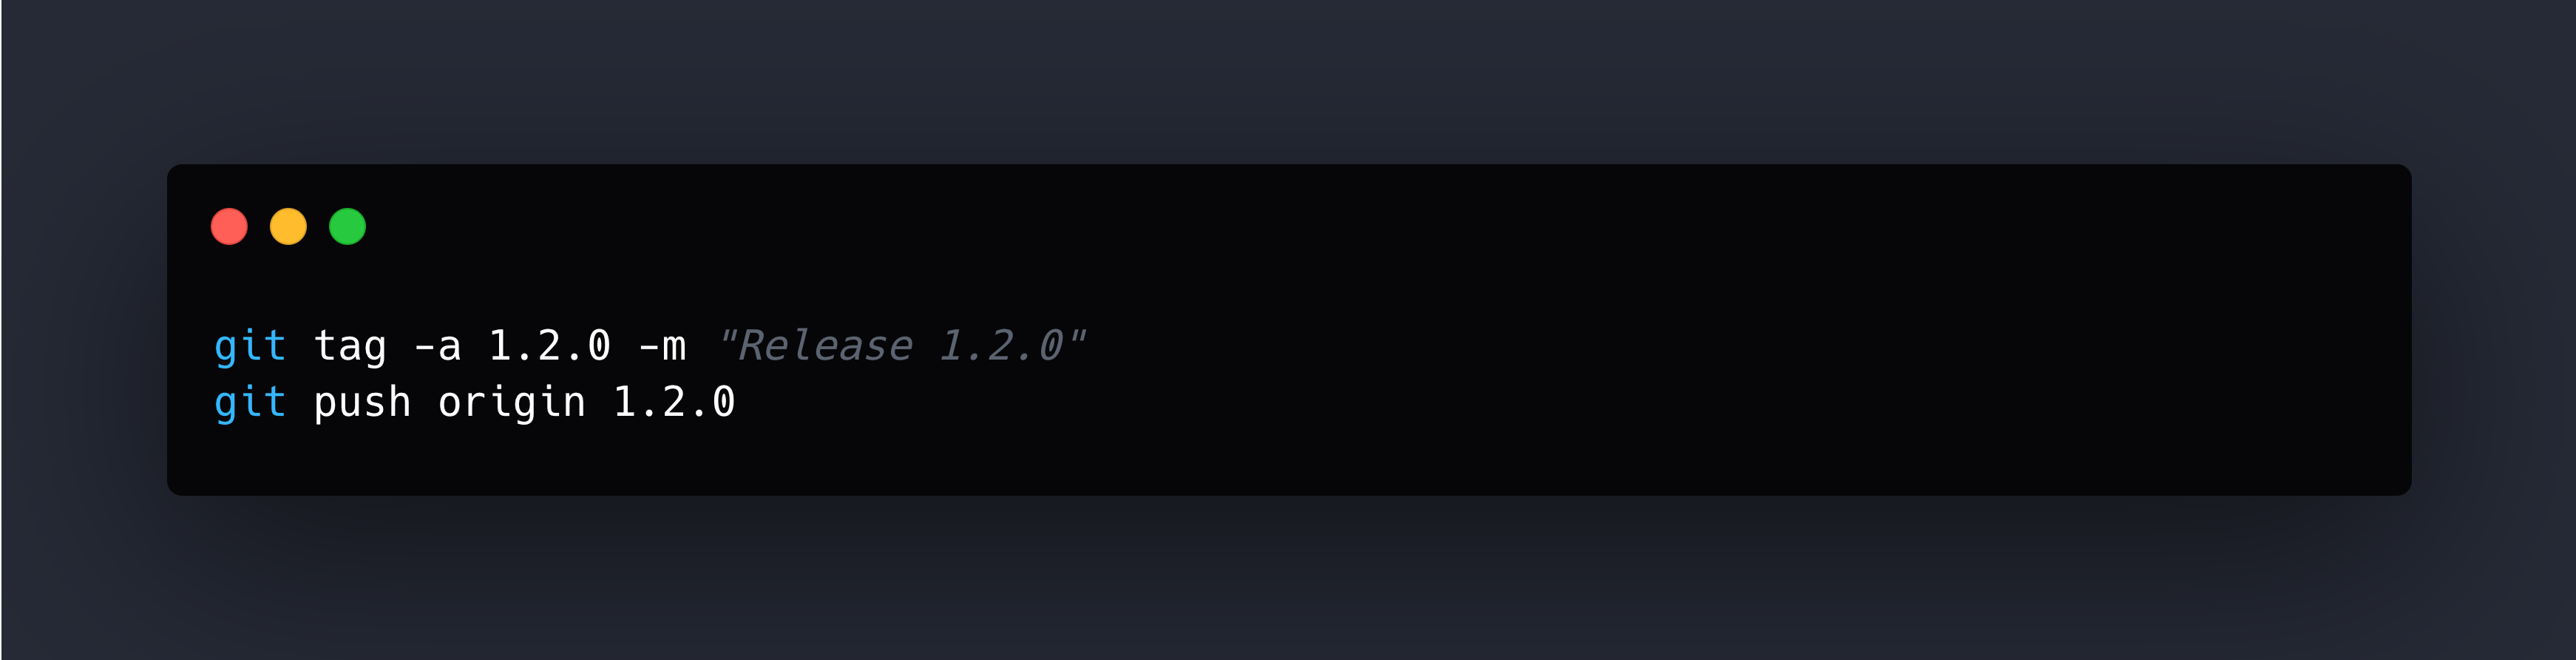
Always use annotated tags (-a) rather than lightweight tags. Be consistent with naming — I prefer 1.2.0 without the v prefix because it matches SPM convention.
SPM Compatibility
Swift Package Manager uses git tags for versioning. When you specify:
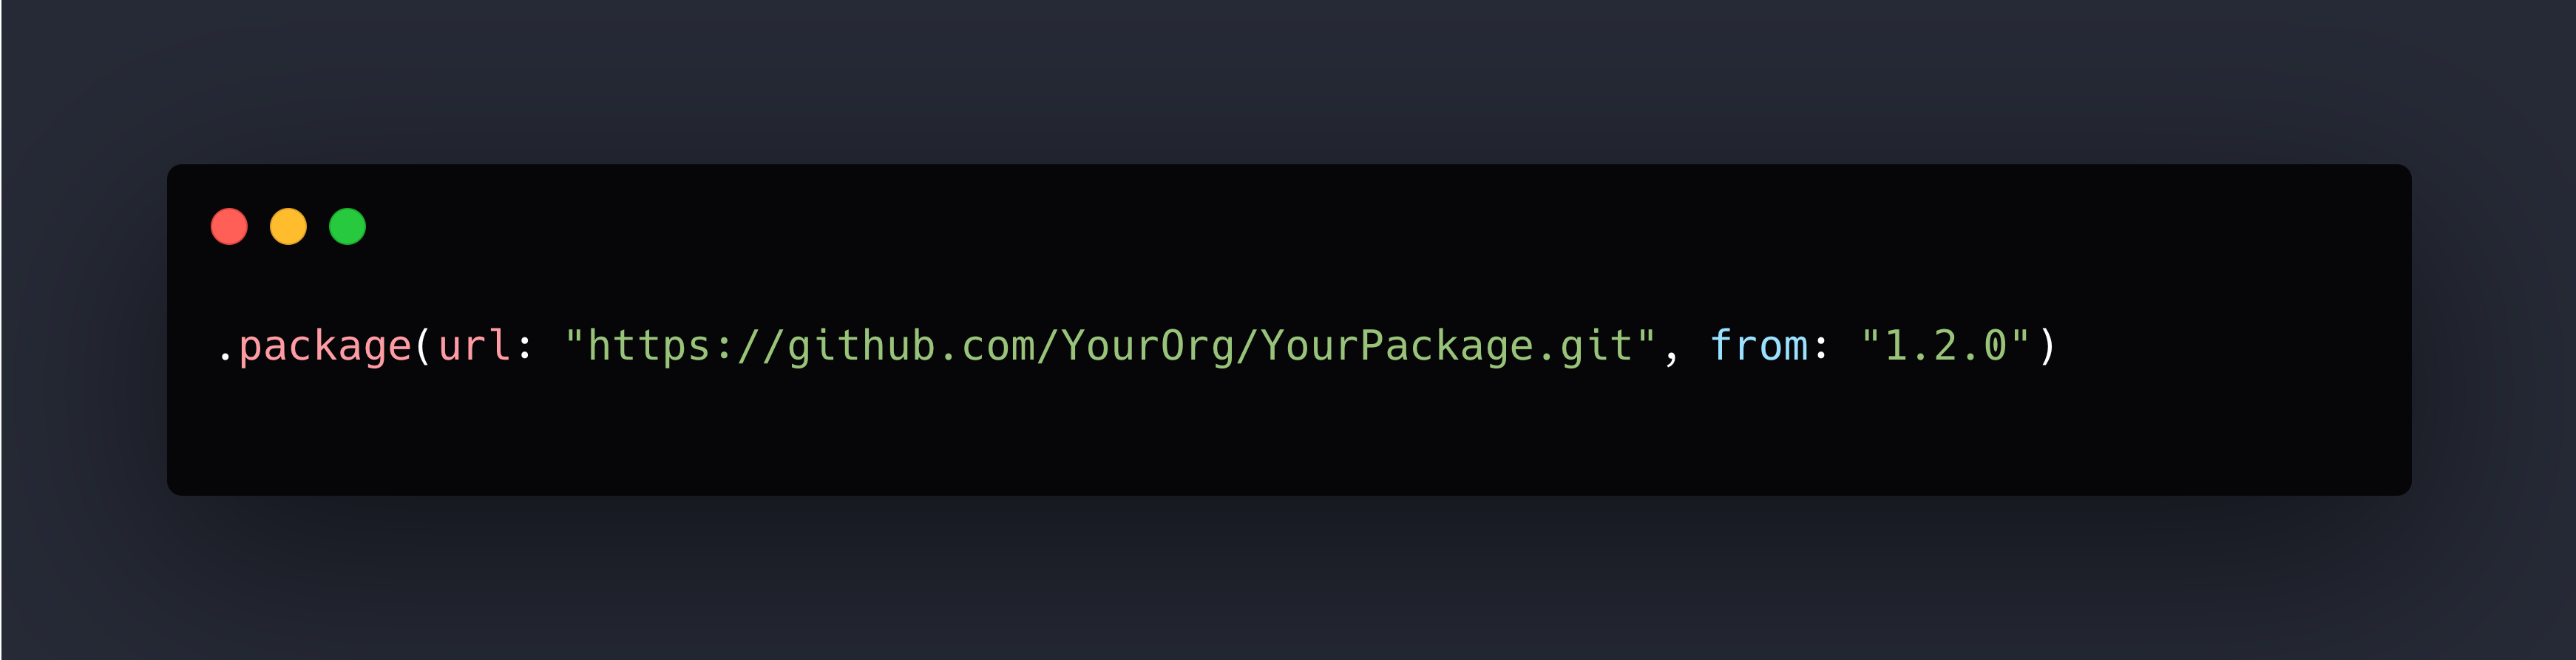
SPM looks for tags like 1.2.0, 1.2.1, 1.3.0, etc. Your tags directly control what versions are available.
This means:
- Every release needs a tag
- Tag names must follow semantic versioning
- Bad tags can’t be easily removed (they break existing dependencies)
Tag carefully. Verify the commit is correct before pushing.
Release Checklist
Before creating a release:
✅ All milestone issues are closed
✅ Tests pass on all platforms
✅ CHANGELOG.md is updated
✅ Version number follows semantic versioning
✅ Documentation is current
Then:
1. Update CHANGELOG.md (move [Unreleased] to version number)
2. Commit: git commit -m "Release 1.2.0"
3. Create tag: git tag -a 1.2.0 -m "Release 1.2.0"
4. Push: git push && git push origin 1.2.0
5. Create GitHub Release with changelog content
The Professional Touch
Regular, well-documented releases signal that your project is actively maintained. Users trust packages with clear versioning and release notes. Your release process is your communication with users about stability and progress.
Part 2 Checklist: Community and Lifecycle
- [ ] Simple PR template (What/Why/Changes)
- [ ] Bug report and feature request issue templates
- [ ] CONTRIBUTING.md with getting started guide
- [ ] Label strategy (bug, enhancement, help wanted, etc.)
- [ ] Milestones for version planning
- [ ] CHANGELOG.md following Keep a Changelog format
- [ ] Semantic versioning with git tags
- [ ] GitHub Releases with release notes
Previous: Part 1: Foundation and Quality
Oleksii Kolomiiets
iOS Developer
Oleksii is an iOS alchemist at Snapp Mobile 📱✨, turning concepts into beautifully crafted Swift code and smooth, user-friendly interfaces. He’s passionate about shaping mobile experiences that feel effortless and refined. A firm believer in the power of simplicity, he focuses on writing clear, thoughtful code that brings ideas to life without unnecessary complexity.


January 5, 2026
Ship It Right: A Swift Package Quality Checklist. Part 2 of 3.
Oleksii Kolomiiets
In Part 1, we built the foundation: documentation, tests, automated quality checks. Your Swift package is technically solid. The code works, it’s well-documented, and it maintains consistent quality.
Now comes the shift: from “my code works” to “others can contribute.”
This series is for Swift developers turning internal packages into polished public repositories. Part 1 covered documentation and quality. This part focuses on community and lifecycle.
This is where many solo-developed projects stumble. The code is great, but there’s no clear path for contributions. Issues pile up without organization. Releases happen chaotically. The infrastructure that worked for solo development doesn’t scale to community development.
The gap isn’t technical — it’s process. You need infrastructure for guiding contributions, managing work, communicating changes, and shipping professional releases.
The first time someone outside your organization contributes to your project is special. They took time to understand your code, fix something, and send it back. Make their experience smooth. A clear contribution path, simple templates, and responsive feedback turn one-time contributors into regular contributors.
The infrastructure we’re building isn’t bureaucracy — it’s hospitality. It shows contributors that you value their time and want to make contributing easy.
PR and Issue Templates: Keep Them Simple
Here’s my philosophy on templates: they should be easy and optional. PR templates with fifteen sections and required checkboxes don’t increase quality — they discourage contributions. Three sections are enough.
I learned this watching pull requests to my own projects. Early on, I created comprehensive templates with sections for “Testing Strategy,”
“Performance Implications,” “Breaking Changes,” “Documentation Updates,” and more. Nobody filled them out completely. Contributors would either skip most sections or write “N/A” repeatedly, which helped nobody.
Now I use minimal templates that guide without overwhelming. Contributions increased because the barrier to entry dropped.
The Simple PR Template
Create .github/pull_request_template.md in your repository:
Issue Templates
For issue templates, see this example: SnappDesignTokens.
CONTRIBUTING.md
Create a brief CONTRIBUTING.md that welcomes contributors and points to essentials:
The Philosophy
Templates exist to help contributors provide useful context, not to enforce process for process’s sake. I’d rather get a PR with minimal template completion but good code than scare away a contributor with a 15-section form. You can ask for clarification during review. You can’t rescue a contribution that never happened because the process felt like too much work.
Issue Management: Planning Beats Stale Ideas
Issues aren’t just for bug tracking. They’re your public roadmap, your planning tool, and your communication channel with users.
An idea without a plan becomes a stale issue. Planning turns ideas into action.
Label Strategy: Keep It Simple
- bug — Something is broken
- enhancement — New feature or improvement
- documentation — Docs need updating
- help wanted — Good for contributors
Milestones: Group by Version
- 1.0.0 — Issues planned for initial release
- 1.1.0 — Issues for first feature update
- 2.0.0 — Breaking changes for next major version
- Future — Ideas we like but haven’t scheduled
Avoiding Stale Issues
Stale issues make repositories look abandoned. Combat this with regular triage.
For stale issues:
This issue hasn’t had activity in 6 months. Is this still relevant? If we don’t hear back in 2 weeks, we’ll close this to keep the issue tracker focused.
For won’t-fix issues:
Thanks for the suggestion. After discussion, we’ve decided not to pursue this because [specific reason]. Closing as wontfix, but appreciate you taking the time to open this issue.
Communication Through Issues
Issues are public communication. How you respond matters:
- Be welcoming: “Thanks for reporting this! I’ll investigate.”
- Be clear about timing: “I won’t have time to look at this until next month, but PRs welcome.”
- Be honest about priorities: “This is a nice idea but not currently on the roadmap. Would love a PR if you’re interested.”
- Close decisively: If you won’t fix something, say so and close it.
An issue is valuable only if it has a path forward. If an issue has no path forward, close it. You can always reopen if circumstances change.
CHANGELOG.md: Simple Version History
A changelog lists what changed in each version. Users need to know what changed between versions, especially when deciding whether to upgrade.
I keep a CHANGELOG.md in every repository. When I cut a release, I update the changelog. When users ask “what changed in 1.2.0?”, we can point them to the changelog.
Categories: Added, Changed, Deprecated, Removed, Fixed, Security. Not every release needs every category. Use what’s relevant.
Keeping It Updated
Update the changelog as you merge changes, not at release time. When you merge a PR:
- If it adds a feature, add an entry under [Unreleased] → Added
- If it fixes a bug, add an entry under [Unreleased] → Fixed
- If it’s a breaking change, add an entry under [Unreleased] → Changed
This is easier than trying to remember everything at release time.
Integration With Releases
When you create a GitHub Release, copy the changelog entry into the release notes:
Releases and Tags: Semantic Versioning Made Easy
Releases communicate stability and progress. A well-managed release process tells users “this version is stable and ready” while giving them clear expectations about what changed.
For Swift Package Manager projects, tags are particularly important — they’re how users specify which version of your package to use.
Semantic Versioning
SemVer uses three numbers: MAJOR.MINOR.PATCH
- MAJOR — Breaking changes that require users to modify their code
- MINOR — New features, backward-compatible additions
- PATCH — Bug fixes, no API changes
This convention sets clear expectations. When I see 1.2.3 to 1.2.4, I know it’s safe. When I see 1.2.4 to 2.0.0, I know to check the changelog.
Creating Git Tags
Tags mark specific commits as releases:
Always use annotated tags (-a) rather than lightweight tags. Be consistent with naming — I prefer 1.2.0 without the v prefix because it matches SPM convention.
SPM Compatibility
Swift Package Manager uses git tags for versioning. When you specify:
SPM looks for tags like 1.2.0, 1.2.1, 1.3.0, etc. Your tags directly control what versions are available.
This means:
- Every release needs a tag
- Tag names must follow semantic versioning
- Bad tags can’t be easily removed (they break existing dependencies)
Tag carefully. Verify the commit is correct before pushing.
Release Checklist
Before creating a release:
✅ All milestone issues are closed
✅ Tests pass on all platforms
✅ CHANGELOG.md is updated
✅ Version number follows semantic versioning
✅ Documentation is current
Then:
1. Update CHANGELOG.md (move [Unreleased] to version number)
2. Commit: git commit -m "Release 1.2.0"
3. Create tag: git tag -a 1.2.0 -m "Release 1.2.0"
4. Push: git push && git push origin 1.2.0
5. Create GitHub Release with changelog content
The Professional Touch
Regular, well-documented releases signal that your project is actively maintained. Users trust packages with clear versioning and release notes. Your release process is your communication with users about stability and progress.
Part 2 Checklist: Community and Lifecycle
- [ ] Simple PR template (What/Why/Changes)
- [ ] Bug report and feature request issue templates
- [ ] CONTRIBUTING.md with getting started guide
- [ ] Label strategy (bug, enhancement, help wanted, etc.)
- [ ] Milestones for version planning
- [ ] CHANGELOG.md following Keep a Changelog format
- [ ] Semantic versioning with git tags
- [ ] GitHub Releases with release notes
Previous: Part 1: Foundation and Quality
Oleksii Kolomiiets
iOS Developer
Oleksii is an iOS alchemist at Snapp Mobile 📱✨, turning concepts into beautifully crafted Swift code and smooth, user-friendly interfaces. He’s passionate about shaping mobile experiences that feel effortless and refined. A firm believer in the power of simplicity, he focuses on writing clear, thoughtful code that brings ideas to life without unnecessary complexity.